Last updated: 9 September 2026
Monster Hunter Wilds Hammer Build Guide — KO System, Charge Mechanics & Best Skills
The Hammer is one of Monster Hunter Wilds's most straightforward weapons on the surface — wind up, smash the head — and one of the most strategically layered once you understand its stun economy. Unlike bladed weapons that target weak spots anywhere on a monster, the Hammer runs a second resource alongside raw damage: the hidden KO meter, which fills only from head hits and rewards persistent head targeting with a full monster stun that creates a huge, free damage window for your entire team. Combine that with the Hammer's four-level charge system — super armor through incoming hits during any charge, and a devastating Mighty Charge at Level 4 that transitions into a slam finisher — and the Hammer rewards aggressive, committed play unlike almost any other weapon. This guide covers how the KO system works, the core charging loop, skills to prioritise, and the current endgame build landscape for Title Update 4. Cross-check the official game wiki if patches have landed after this guide's verified version.
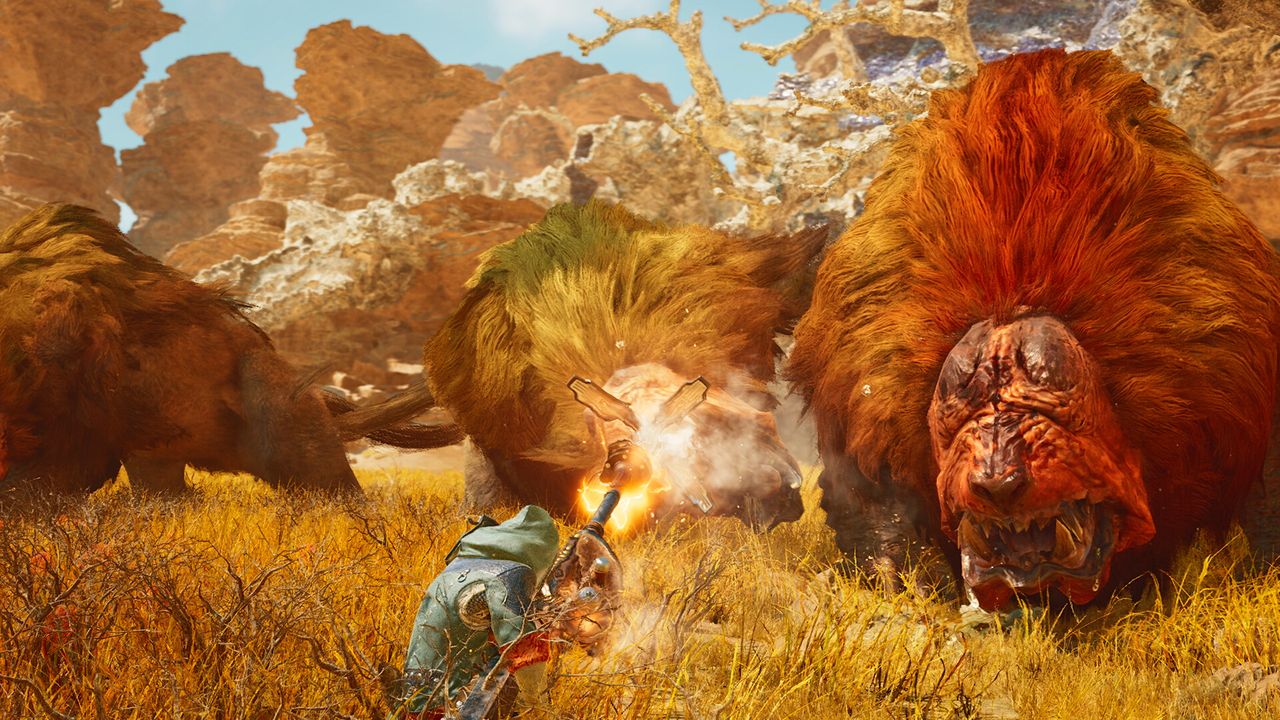
Always aim charged attacks at the monster's head — body hits deal damage but build no stun. Charge to Level 4 (Mighty Charge) for maximum KO damage — super armor applies during any charge level. Core skills: Slugger, Weakness Exploit, Agitator, Attack Boost.
01Why Play Hammer?
The Hammer has a deceptively short learning curve and a genuinely deep skill ceiling. Its three defining strengths:
- KO / stun system: The Hammer has one of the highest KO damage outputs of any melee weapon in Monster Hunter Wilds — and is the game's primary dedicated KO weapon. Land enough hits on a monster's head and it staggers into a full stun — several seconds of complete helplessness where the entire team can unload their heaviest moves. In multiplayer, a Hammer hunter who maintains consistent head targeting is one of the most valuable contributors to a hunt.
- Raw-damage efficiency: Hammer motion values are built around heavy, fully-charged hits rather than multi-hit combos. This means each individual swing matters, and Attack Boost translates directly into larger numbers per smash. The weapon rewards patient build optimisation because there is no elemental complexity to manage — just maximise raw and swing at the head.
- Charge super armor: Super armor applies as a baseline property during any charge — you gain it the moment you begin winding up at any of the four charge levels, not by entering a special mode. Against monsters that interrupt other melee weapons mid-combo with rapid strikes, the Hammer can simply power through and deliver its hit regardless — a genuine defensive advantage disguised as an offense mechanic.
The trade-off: Hammer has no block and no dodge-counter mechanic. Defence is pure repositioning and reading monster attack patterns. Charged attacks are also committed — once you begin winding up a Level 3 charge, you are locked into the animation for a moment. Learning which attacks you can safely tank through while charging versus which require a clean dodge is the core Hammer skill. If you prefer a weapon with a dedicated counter, see the Long Sword Build Guide for Foresight Slash and Iai Spirit Slash mechanics.
02The KO System: Your Superpower
Every monster in Monster Hunter Wilds has a hidden KO meter associated with its head. Filling this meter causes a full stun — the monster collapses, leaving it completely vulnerable for several seconds. Understanding the rules of this system is foundational:
Two rules to internalise:
- Only head hits fill the KO meter. A Hammer strike landing on a monster's back, leg, or tail deals its full raw damage but contributes nothing to stun. This makes head positioning the single most important habit for Hammer hunters — always be thinking about how to keep your swings arcing toward the face.
- The KO meter persists and can reset multiple times. The meter carries over as you follow a monster between zones within the same quest. A monster can be stunned more than once per hunt, though the threshold increases slightly with each successive stun — the first stun is the cheapest, so establish head-targeting discipline from the very first engagement.
When the stun fires, the monster collapses fully — no attacks, no roars, no evasive behaviour. Use this window to chain your heaviest charged attacks, trigger Focus Strikes on any open head wounds, and let your team pile in simultaneously. A well-timed stun during a team hunt is one of the biggest damage multipliers in the game.
03Charge Levels and the Core Combo Loop
Hammer charges its attacks into four levels by holding the attack button. Each level delivers a progressively harder hit: Level 1 is a Charged Side Blow, Level 2 a Charged Upswing, Level 3 a Charged Big Bang, and Level 4 is the Mighty Charge — a windmill swing that transitions into a devastating Mighty Charge Slam finisher. Mighty Charge is Wilds's top-tier Hammer attack and your primary KO-damage tool in an extended head-targeting window.
Super armor and new MH Wilds moves: Super armor is a baseline property of charging — it applies the moment you begin holding any charge level, not gated behind a special mode or stance. The higher the charge level, the longer the super-armor window lasts. MH Wilds also adds two new Hammer moves: Charged Step, an evasive dodge usable while charging that lets you reposition mid-wind-up without cancelling; and Offset Attack, a counter built into the Charged Upswing finisher that delivers a counter hit with bonus stagger value when timed on a monster's attack.
The core combat loop:
- Position to face the monster's head. For most monsters this means attacking from just below the neck or slightly to the side — directly in front often means trading hits with the monster's own attacks.
- Build to Level 2 or Level 3 charge. Hold the attack button through the backswing animation. A Level 2 Charged Upswing is the practical mid-hunt default — it hits hard, applies super armor, and keeps pace with a mobile monster. Reserve Level 3 or Level 4 charges for clear topple windows or when the monster is stationary.
- Push to Mighty Charge when safe. Holding through Level 3 into Level 4 delivers the Mighty Charge windmill and its Slam finisher — maximum KO damage and raw output. Use it during stuns, topples, or any extended free window.
- Use Charged Step to reposition if the monster moves. Rather than cancelling a charge entirely, use the Charged Step dodge to stay near the head and resume the wind-up.
- Watch for the stun. When the KO meter fills, the monster stumbles and collapses. Immediately chain your highest-damage moves — Level 3 or Mighty Charge attacks and any Focus Strike if a wound is open — before the stun expires.
Spinning Bludgeon (spin attack): The Hammer also has a spinning multi-hit attack covering wide horizontal arcs. It deals solid aggregate damage and helps reposition against moving targets, but its KO efficiency per second is lower than focused charged attacks aimed at the head. Use it when a monster is running between zones or during brief repositioning moments — not as your primary head-targeting tool.
04Focus Mode and Wounds
See the Focus Mode and Wounds guide for full wound mechanics. For Hammer specifically:
- Prioritise head wound Focus Strikes. Wounds can open on monster heads from repeated blunt-impact hits. Once a head wound is open, a Focus Strike against it deals concentrated stagger damage and creates a topple window — chain directly into charged attacks during that topple for your highest-damage burst of the hunt.
- Enter and exit Focus Mode between charges, not during them. Activating Focus Mode while holding a charge interrupts the wind-up. Enter during the brief recovery after a swing connects, scope the wound, then release to resume charging.
- KO synergy with Wounds: The KO stun and wound topple are independent systems — they can stack. A stun creates a free window to finish opening a head wound; a Focus Strike on that wound extends the free window further. Stacking both in sequence is the ideal Hammer loop and rewards hunters who track both resources simultaneously.
05Key Skills to Prioritise
Hammer's skill priority is tightly focused — it needs Slugger, strong raw-damage skills, and affinity. The budget is simpler than elemental weapons because there is no element matchup to juggle:
- Slugger (3 points): Directly increases the KO/stun damage on every Hammer hit. Because KO damage is a parallel resource entirely separate from raw hit damage, Slugger gives the Hammer a second effective damage multiplier that no other skill provides. This is the Hammer's weapon-specific essential — analogous to Quick Sheathe on Long Sword. Max it at 3 points before any other non-survival skill.
- Weakness Exploit (5 points): Increases Affinity (critical hit chance) when striking monster weak hitzones, reaching up to +50% affinity on wounded weakpoints at maximum rank. Monster heads are almost always weak hitzones, and Hammer targets them constantly — so Weakness Exploit fires with near-100% uptime. The single highest-impact universal offensive skill for this weapon.
- Agitator (3–5 points): Boosts both Attack and Affinity while the monster is enraged. Most endgame fights have the monster enraged for a majority of the encounter, giving Agitator near-permanent uptime. Pairs with Weakness Exploit for a large combined damage multiplier during peak monster aggression.
- Attack Boost (3–5 points): Directly scales with Hammer's raw-focused kit. Attack Boost caps at Level 5 in Monster Hunter Wilds. Because Hammer does not split its potential across element or status, every point of flat raw attack translates efficiently. Lower priority than the three skills above — fill with remaining decoration slots.
- Critical Boost (5 points): Increases the damage multiplier on critical hits, each level adding +3% critical damage up to a maximum of +15% at Lv 5. Once Weakness Exploit and Agitator push Affinity above 60–70%, Critical Boost amplifies every critical strike meaningfully. Take it after the priority skills are secured.
- Health Boost (3 points): Non-negotiable at Arch-Tempered content. Hammer's charge super armor approach involves intentionally absorbing some hits — more HP directly reduces the risk of a single unlucky heavy attack ending the quest.
06Progression Builds: Low Rank to High Rank
Low Rank does not require an optimised build. Focus on keeping the weapon sharp and ingraining the head-targeting habit — that habit transfers directly to endgame more than any specific gear choice.
Low Rank (HR 1–14):
- Weapon: Iron Hammer II from the Smithy covers the entire Low Rank campaign with steady upgrades. Switch to the first named monster Hammer you can craft (Jagras, Kulu-Ya-Ku lineages) as soon as materials allow — raw attack is the only meaningful stat difference at this stage.
- Armor: Full Bone or any mixed Low Rank set. Prioritise weapon upgrade funds over armor upgrades — a sharp weapon at a lower tier outperforms a blunt one at a higher tier.
- Skills to aim for: Slugger Lv 1–2 from set bonuses or decoration drops if available. Otherwise any Attack Boost is fine. Do not min-max Low Rank — learn the KO loop first.
High Rank (HR 15–50+):
- Weapon: Craft the Guardian Rathalos Hammer once HR Guardian Rathalos materials are accessible — it provides a solid raw base with reliable sharpness for this stage. Upgrade it to maximum before moving to the next tier.
- Armor target: A mixed set combining Guardian Rathalos and Blangonga armor pieces is a well-regarded midgame combination, naturally delivering Weakness Exploit Lv 3, Agitator Lv 4, and the Blangonga's Spirit set bonus (War Cry — a temporary attack boost for nearby allies) — a strong foundation without intensive farming.
- Decoration priorities: Slot Slugger Jewels first. The KO improvement is immediately tangible — you will notice faster stun loops within one or two hunts. Fill remaining slots with Critical Jewels to capitalise on the Agitator Affinity bonus.
07Endgame Build: Title Update 4 Meta
The TU4 Hammer endgame centres on Artian Hammers as the weapon tier of choice. Artian weapons are crafted through the upgrade system covered in the Crafting and Upgrade guide — they require investigation quest rewards and are time-gated by progression.
Weapon choices — an honest overview: The Hammer community does not converge on a single universally agreed best Hammer the way some weapons do. Three categories appear consistently across community build discussions:
- Artian Hammer: The general endgame recommendation. Artian weapons at maximum upgrade offer a high raw base plus a personal group-skill passive for the wielder (such as Lord's Soul, which provides an attack boost and a one-hit-KO-prevention buffer). The specific named Artian Hammer available depends on which investigations you have completed, but any maxed Artian Hammer outperforms non-Artian alternatives in raw terms. This is the practical endgame target for most hunters.
- Monster-specific Hammers (e.g. Graviton Hammer): Several named monster Hammers appear in community build discussions as strong non-Artian alternatives, particularly for hunters who want a confirmed high raw ceiling without the investigation farming grind. The Graviton Hammer is a commonly cited accessible option if Artian materials are not yet available — and some experienced hunters prefer specific picks for particular matchups.
- Element Hammers for specific hunts: While Hammer generally favours raw, certain fights with extreme head elemental weaknesses make an element Hammer situationally competitive. This is a minority case — for the majority of hunts, a strong raw Artian Hammer is the reliable choice.
Because the Hammer community meta has shifted with each title update as players optimise, always cross-check the current recommended weapon against community sources (Reddit r/MonsterHunterWilds builds, Game8, Mobalytics) for your specific patch version. Specific motion-value numbers vary by augments and patch and are not listed here to avoid stale information.
Armor mix (TU4 endgame):
- Gogmazios α armor pieces provide elite decoration slots and contribute to the Mutual Hostility set bonus, which boosts elemental damage (Mutual Hostility I) and grants a defensive damage barrier triggered during monster enrage (Mutual Hostility II). The α chest and arms are consistently cited as core TU4 endgame pieces across weapon types.
- Fill remaining slots with β pieces from Guardian Ebony Odogaron or Lagiacrus sets for slot efficiency, allowing Critical Jewel III decorations in the remaining spaces.
- Target the complete endgame skill spread: Slugger Lv 3, Weakness Exploit Lv 5, Agitator Lv 5, Attack Boost Lv 4–5, Critical Boost Lv 5, Health Boost Lv 3.
For Arch-Tempered content (HR 100+): Maintain Health Boost Lv 3 and Stun Resistance Lv 3 as mandatory slots. AT monsters hit hard enough that the charge super-armor approach — intentionally tanking hits to maintain your combo — becomes significantly riskier. Read each AT monster's attack patterns before deciding which hits to super-armor through and which require a clean dodge. The Arkveld γ chest (AT Arkveld reward, see the Arkveld guide) offers excellent slot efficiency and carries the Lord's Soul group skill, which needs two other pieces sharing it to activate — plan the rest of the set around that if you want it online.
FAQ
Is Hammer good in Monster Hunter Wilds?
Yes — Hammer is one of Monster Hunter Wilds's strongest weapons in both solo and multiplayer. Its KO system is unique: no other melee weapon builds the stun meter as efficiently, and a stunned monster creates a completely free damage window for your entire team. Solo, the Hammer's baseline charge super armor lets you trade hits and maintain combo momentum against aggressive monsters. In multiplayer, consistent head targeting from a Hammer player is one of the most impactful contributions possible.
How does the Hammer KO system work in Monster Hunter Wilds?
Every monster has a hidden KO meter tied specifically to its head. Hits landing on the head fill this meter; hits on any other body part deal full damage but contribute nothing to stun. When the meter fills, the monster collapses into a full stun for several seconds — completely unable to act. The meter carries over as you follow the monster between zones within the same quest, and a monster can be stunned more than once per hunt, though the threshold increases slightly with each successive stun.
How does charging work in Monster Hunter Wilds Hammer?
Hammer has four charge levels accessed by holding the attack button: Level 1 (Charged Side Blow), Level 2 (Charged Upswing), Level 3 (Charged Big Bang), and Level 4 (Mighty Charge — a windmill swing into a Mighty Charge Slam finisher). Super armor applies as a baseline property during any charge level, not gated behind a special mode; the longer you charge, the longer that super-armor window lasts. Mighty Charge is the highest-damage tier and your primary tool during free windows. MH Wilds also adds Charged Step (an evasive dodge usable mid-charge for repositioning) and Offset Attack (a counter built into the Charged Upswing finisher).
What skills should I use for Hammer in Monster Hunter Wilds?
The core skill priority for Hammer is: Slugger Lv 3 first (increases KO/stun damage — the Hammer's unique second multiplier), then Weakness Exploit Lv 5 (Affinity on head hitzones, near-100% uptime on Hammer — up to +50% on wounded weakpoints at cap), then Agitator Lv 3–5 (Attack and Affinity during monster enrage). Fill remaining slots with Attack Boost (cap Lv 5) and Critical Boost (cap Lv 5). Health Boost Lv 3 is mandatory for Arch-Tempered content. The priority list is shorter and more focused than elemental weapons.
Does elemental damage matter for Hammer builds in Monster Hunter Wilds?
Less than for most weapons. Hammer's charged attacks are slow and hit-limited — they do not proc elemental effects as efficiently as multi-hit weapons like Dual Blades or Bow. For the vast majority of hunts, a strong raw Artian Hammer outperforms a matched-element Hammer because you capture the full motion value on each heavy hit without splitting your build across raw and elemental stats. Element Hammers can be situationally competitive against monsters with extreme head elemental weaknesses, but raw is the reliable default.
What is the best Hammer in Monster Hunter Wilds endgame?
As of Title Update 4, Artian Hammers are the general endgame benchmark — they offer the highest raw base plus a personal group-skill passive for the wielder. Which specific Artian Hammer depends on your investigation progress. Monster-specific Hammers such as the Graviton Hammer are strong non-Artian alternatives some hunters prefer for their direct availability or matchup advantages. Because the meta shifts with each title update and patch, cross-check current community sources — Reddit r/MonsterHunterWilds builds, Game8, Mobalytics — for the most recent specific recommendation for your version.
Is Hammer better for solo or multiplayer in Monster Hunter Wilds?
Hammer performs well in both but shines most in multiplayer. In a four-player hunt, a Hammer hunter who consistently targets the head contributes KO stuns that freeze the monster for the entire party — a benefit that scales directly with team size. Solo, the charge super armor and stun windows are valuable but their benefit stays with you alone. Solo Hammer is still strong — the damage ceiling is high — but its multiplayer team-utility through KO stuns is genuinely exceptional compared to most other weapons.
Sources
Where the facts on this page were checked. If one of them now says something different, we want to know — tell us and we will fix the guide.
- Hammer Fextralife
- Graviton Hammer Fextralife
- Arkveld Gamma Set Fextralife
- Guardian Rathalos Armor Set Icy Veins
- Blango Alpha Armor Set Icy Veins
New & updated guides ship every week. Follow the Atom feed or get notified when new Monster Hunter Wilds guides land.