Last updated: 5 September 2026
Elden Ring Nightreign Limveld Map Guide Locations, Night's Tide, and Shifting Earth
Limveld is the only map in Elden Ring Nightreign — the co-op roguelike spin-off from FromSoftware and Bandai Namco released May 30, 2025. Unlike the open-ended exploration of the base Elden Ring, every expedition in Limveld runs on a three-day clock, and the Night's Tide boundary is always shrinking. Knowing which of the 13 key location types to prioritise and when, how the Night's Tide timer works, where the Spirit Shelter is before the Day 3 Nightlord fight, and how each Shifting Earth event reshapes the map is the difference between arriving well-equipped and arriving frantic. This guide covers all of it.
01How Limveld Works: The Map Is Always Fully Visible
One of Nightreign's most useful features is also easy to overlook: the moment you drop into Limveld, the whole map is revealed immediately. Church, Fort, Ruins, Evergaol, Field Boss, and every other location icon is visible on the map screen before you take a single step — there is no fog-of-war discovery mechanic gating any location type. Unlike base Elden Ring, where exploration slowly uncovers the map, Limveld asks you to plan a route from the start.
This full visibility matters because time pressure is always present. The Night's Tide boundary starts shrinking within a few minutes of each day beginning, so you cannot afford to wander between locations hoping to stumble onto something useful. Plan your Day 1 route during the brief moment of stillness at the beginning of each run.
The one constant landmark is the Castle, which sits at the centre of the map on every expedition and never changes position. The four Spectral Hawk Trees anchor the corners of the map and always provide the same fast-travel routes. Everything else — the distribution of Churches, Forts, Ruins, field bosses, and optional locations — shifts between runs.
Shifting Earth events, when one is active, replace one corner section of the map entirely with a new environment. These are covered at the end of this guide.
02Night's Tide: The Shrinking Circle
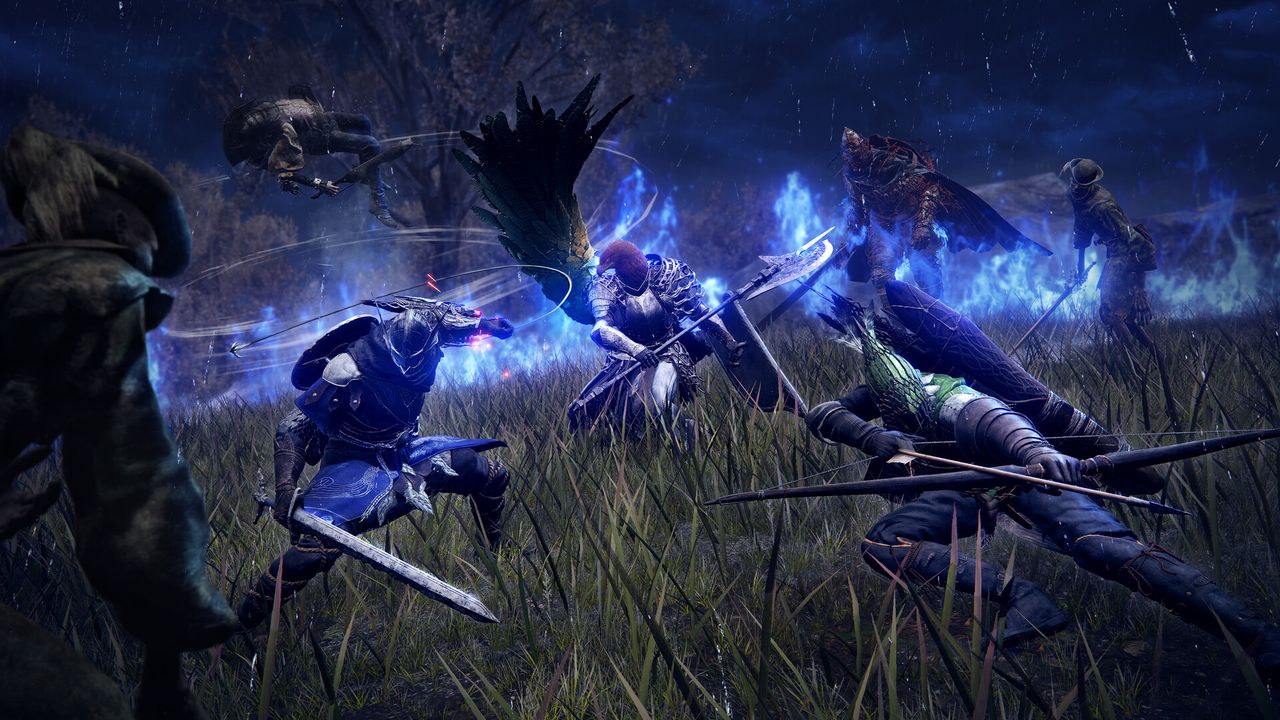
The Night's Tide is Limveld's equivalent of a battle-royale ring: a boundary of blue flame that closes inward from the map edge, dealing escalating damage to any player caught outside the safe zone. Understanding its timer keeps you from being forced into bad fights or losing HP for free.
The schedule is the same on both Day 1 and Day 2:
- ~4:30 into the day: The first notification appears and the Night's Tide begins its initial contraction. This is your signal to wrap up whatever you are doing and start heading toward your next location or the general centre.
- ~11:00 into the day: A second message announces an accelerated shrink. The ring contracts much faster at this stage, funnelling all players toward the Night Boss encounter arena.
- Shortly after the accelerated shrink: The circle closes fully at the Night Boss arena. A group of herald enemies spawns first; their type signals which Night Boss is about to appear. The Night Boss itself arrives after they are dealt with.
- Taking damage outside the boundary: Early in the contraction phase, the damage is modest and can be healed through. Once the accelerated shrink is underway, damage frequency and magnitude increase sharply. Do not try to complete a location when you are already behind the circle in this window — leave it.
After you defeat each Night Boss, the Night's Tide resets for the next day.
03The 13 Key Location Types
Thirteen distinct location types appear on Limveld's map each expedition. Their relative positions shift between runs, but their icons are consistent on the map screen:
- Church — The highest-priority early stop on any run. Interact with the altar inside to permanently increase your Flask of Crimson Tears charge count by one for that expedition. Churches have minimal enemy presence and are safe to visit quickly. A second Church, if it appears within the Night's Tide boundary on Day 1, is always worth a detour.
- Great Church — A larger, more dangerous version of a Church. These reward Sacred Seals and Stonesword Keys in addition to flask charges. Two layout variants exist — one features an underground section with a boss room, the other is surface-level. Clearing the boss inside yields better loot than a standard Church.
- Fort — Two Forts typically appear on the map each run, modelled on Fort Haight's structure from base Elden Ring. Inside, look for an anvil (weapon upgrades), a merchant, and crucially a treasure map in the keep that marks the locations of buried treasures and Teardrop Scarabs nearby on the main map. A chest inside also contains Stonesword Keys for Evergaols. Forts have a mini-boss in the inner area.
- Main Encampment — A sprawling military-style base with high enemy density, weapon racks, a Smithing Table, and often a merchant. Archers in the towers can be knocked from their perches. Good rune income and armament variety, but time-consuming to clear fully — prioritise the merchant and Smithing Table and leave if the Night's Tide is approaching.
- Ruins — Underground passages leading to chests and a boss encounter. Ruins tend to be affinity-specific (fire, magic, etc.) and the chests inside often contain weapons matching that affinity. Two layouts exist depending on the run: one uses ascending terrain with parallel passages, the other is flat with a staircase entrance.
- Tunnel Entrance — Narrow underground mine networks. The primary reason to visit Tunnels is Smithing Stones: the miners and trolls inside drop them consistently, and Smithing Stones are the main resource for upgrading weapons at anvils and Smithing Tables. Be aware that Tunnels have multiple exits — check the map before entering so you exit toward your next destination rather than back toward where you came.
- Evergaol — Sealed boss arenas that require a Stonesword Key to activate. Each one summons a captured mini-boss (expect Crucible Knights, Godskin Duo, or similar dangerous enemies). Every Evergaol boss offers two Dormant Powers as a reward: a Rune of the Strong (a lump sum of runes, worth more from tougher bosses) and an Upgrade item — the exact totals scale with how dangerous the captured boss is. Several Evergaols can appear on a given expedition.
- Sorcerer's Rise — Sealed towers containing Glintstone Staves and talismans. Accessing one requires finding and breaking a seal nearby before the tower door opens. Worth visiting only if your party has a magic-focused Nightfarer (Recluse or Scholar) who can use the staff rewards — the time investment of finding the seal makes it lower priority for melee-heavy trios.
- Field Boss — Marked by a dragon head on the map. These are powerful standalone boss encounters that drop Dormant Powers: permanent within-run passives or armaments that substantially alter your build. Field Bosses come in two tiers: harder ones drop two Purple+ armaments and a Purple+ upgrade (or a Wending Grace for solo runs), while easier ones drop two Blue+ armaments and a Blue+ upgrade.
- Castle — The largest fixed location on the map, always at the centre of Limveld. Covered in its own section below.
- Township — A rare spawn featuring a lone merchant with an expanded inventory, an anvil, and a petrified NPC. Township merchants carry talismans, rare weapons, and consumables not commonly available elsewhere. If one appears on your map, reaching it before the Night's Tide closes that section of the map is worth adjusting your route for.
- Spectral Hawk Tree — Large glowing trees anchored at the four corners of the map. Covered in their own section below.
- Spiritstream — Vertical-launch energy columns at the base of cliffs. Stepping into one propels you upward with a brief glide, letting you navigate elevation changes without needing to walk up slopes or find paths around cliff faces. Not a destination in themselves, but critical for reaching elevated locations quickly.
04The Castle: Limveld's Central Landmark
The Castle is the largest and most consistent location on every expedition. It sits at the geographic centre of Limveld and never moves between runs, making it a reliable anchor for mid-run navigation.
The Castle is a multi-level structure with four distinct zones: the sewers (accessible via two aqueduct entrances at the base, containing a boss room and a post-boss Site of Grace), the courtyard (open grassy area with multiple mini-bosses), the palisades (U-shaped walls with additional mini-bosses, accessible by Spiritstream or internal staircases), and the rooftop (highest difficulty zone, requiring wall-jumping to reach).
In total, the Castle houses several mini-boss encounters spread across its four levels, making it one of the highest-density sources of rune income and loot in any expedition. A chest in the Castle courtyard contains a set of Blue+ or better Talismans — reliable equipment to build around heading into Day 3.
Practically, the Castle is best visited near the end of Day 2 rather than Day 1. The enemies inside are dangerous, and the time required to clear even a portion of it meaningfully is substantial. On Day 1, prioritise faster locations (Churches, Forts) that pay off more quickly relative to time spent. By Day 2, your weapons are upgraded enough that the Castle becomes efficient rather than punishing.
05Spectral Hawk Trees: Fast Travel Across Limveld
The four Spectral Hawk Trees are fixed at the corners of the Limveld map. They are the primary fast-travel system within a run — riding a Spectral Hawk lets you cover large distances quickly, which matters most when the Night's Tide is contracting and you need to cross the map toward the closing circle.
When you approach a Spectral Hawk Tree and mount a Hawk, the bird follows a designated route visible as flowing lines on the map view, connecting the four corner trees to each other and to points across the map. You can deviate slightly from the route during flight — Spectral Hawks give you limited directional control — but they broadly follow their predetermined path.
Use Spectral Hawks at two key moments: at the start of a day to reach a distant high-priority location before the Night's Tide first shrinks (~4:30), and at the 11-minute mark when the final contraction begins and you need to cross quickly toward the Night Boss arena. Walking across Limveld to escape the ring in the final two minutes is significantly riskier than riding a nearby Hawk.
06Night Bosses: End-of-Day Encounters
At the end of each of the first two days, when the Night's Tide fully closes, a Night Boss encounter begins. Night Bosses are mandatory — you cannot progress to the next day without defeating one.
Before each Night Boss appears, a group of herald enemies spawns in the closed arena. The type of enemies that arrive signals which boss is coming — experienced players learn these tells quickly and can plan their remaining flask charges and positioning around what is about to appear.
Day 1 Night Bosses are generally the easier tier, designed to challenge players at the level and weapon upgrade stage a well-routed Day 1 produces. Day 2 Night Bosses scale significantly and are among the hardest encounters in the game outside of the Nightlord itself — arriving at the Day 2 Night Boss with a partially upgraded weapon or a depleted flask supply is the most common cause of expedition failures before Day 3.
Defeating a Night Boss does two things: it ends the day and resets the Night's Tide boundary to its full starting size for the next day, and it spawns a Site of Grace in the arena where you can level up, restock flasks, and regroup before the next day begins.
Both Night Boss encounters share their timer with the Night's Tide: the same ~14-minute cycle applies to both Day 1 and Day 2.
07The Spirit Shelter: Preparing for Day 3
After defeating the Day 2 Night Boss, a teleporter appears in the arena. Interacting with it brings your party to the Spirit Shelter — a separate hub space that serves as the final preparation point before the Nightlord fight.
The Spirit Shelter contains three essential resources:
- A Site of Grace — Level up using all runes accumulated through Days 1 and 2. This is the last point at which you can spend runes before the Nightlord fight, so clear out your rune total completely. Any runes carried into the Nightlord fight and lost on a wipe are gone.
- A Smithing Table — Upgrade your weapon to its maximum achievable level given the Smithing Stones you've collected. The Spirit Shelter Smithing Table supports the same upgrade tiers as in-world tables — if you visited The Crater Shifting Earth event and unlocked legendary-tier upgrades, you can apply them here.
- A Merchant — Sells consumables and equipment. Stock up on boluses for any ailment the Nightlord inflicts, and replace any Flask of Wondrous Physick you've already used if available.
There is no Night's Tide in the Spirit Shelter and no time pressure — take as long as you need to prepare. Once you leave via the Spirit Shelter exit, the Day 3 Nightlord encounter begins.
08Shifting Earth Events: How They Alter Limveld
Shifting Earth events are persistent map transformations that activate based on your progression through the game. Once unlocked, a Shifting Earth event replaces a corner section of Limveld with a distinct new environment containing its own enemies, bosses, and rewards not available through normal expedition locations. Each expedition can have one active Shifting Earth event, and which one appears is semi-random from your unlocked pool.
Four Shifting Earth events exist in the base game:
- The Crater (north) — Lava flows and an underground temple replace the northern section of Limveld. The primary reward for clearing this area is access to a Special Smithing Table that enables legendary weapon upgrade tiers — the highest upgrade level available in the game. If you find The Crater active, reaching its Smithing Table should be a Day 2 priority regardless of your usual route.
- The Mountaintop (northwest) — Snowy mountain terrain with additional Spiritstreams for vertical traversal. Interacting with a large crystal near the peak grants the Favor of the Mountaintop buff for the rest of the expedition: Frostbite damage and buildup reduced by 50%, plus a temporary attack boost whenever Frostbite procs nearby. Grab it before taking on the zone's Ice Dragon, whose arena is locked in a near-constant blizzard. Useful but not mandatory — prioritise it when your party is Frostbite-relevant.
- Rotted Woods (southeast) — Scarlet Rot invades the landscape, dealing progressive buildup damage just from standing in the affected area. Within the zone, interacting with a hidden red flower (its location is revealed by a map inside the zone's Fort) grants the Favor of the Rotted Woods buff — Scarlet Rot immunity plus a boost to max HP, for you and your allies, for the rest of the expedition. Clear this area with the Favor of the Rotted Woods active; attempting it without the buff makes the environment itself a constant attrition drain.
- Noklateo, The Shrouded City (southwest) — A large walled city structure with underground sewer access. Defeating the Naturalborn of the Void boss within grants the Favor of Noklateo, which enables a one-time resurrection with a temporary power enhancement on activation. A form of in-run insurance for the Nightlord fight, particularly valuable for solo runs where Wending Grace items are already the primary safety net.
Shifting Earth sections replace a corner of the map, which means one of the four Spectral Hawk Trees is displaced when a Shifting Earth is active. The remaining trees still function normally.
Deep of Night mode, the higher-difficulty mode associated with Everdark Sovereign bosses, ignores whichever Shifting Earth you've manually selected at Roundtable Hold — but its base map can still randomly transform into any of the four Shifting Earth environments on its own. You cannot choose which one, if any, appears.
09Route Priority by Day
Translating the location knowledge above into an actual route for each day:
- Day 1 priorities: Church first (adds a flask charge before any serious combat), then Fort (treasure map reveals scarabs for talisman income later, plus Stonesword Keys). If a Spectral Hawk route connects these efficiently, use it. Avoid the Castle on Day 1 unless your route passes directly through it late in the day with a well-upgraded weapon.
- Day 2 priorities: Castle late in the day (after weapons are upgraded from Day 1 drops), plus any Evergaols you have Stonesword Keys for — the Dormant Power reward scales with the boss inside, so tougher Evergaols mid-to-late Day 2 return more than easy ones early Day 1. If The Crater Shifting Earth is active, route through it before the Castle to unlock the legendary upgrade tier for your weapon.
- Both days: Track the Night's Tide timer. At 11 minutes, stop engaging new locations and move toward where the Night Boss arena will form — always in the area the ring is closing toward. Arriving at the Night Boss arena with flasks unspent and a full HP bar is worth more than clearing one more location you barely have time for.
Field Bosses are opportunistic picks: take them if they appear directly on your route and the Night's Tide is not yet threatening. A field boss that requires backtracking is rarely worth the time except at the start of a day when the ring is still wide.
FAQ
What is the map in Elden Ring Nightreign?
The map is called Limveld. It is the only map in the game, and the entire map is revealed at the start of every expedition — you can see all location types, including Evergaol and Field Boss markers, immediately on the map screen without needing to explore to uncover them. The Castle always sits at the centre of the map. Shifting Earth events can replace corner sections of the map with entirely different environments, but the core layout remains consistent between runs.
How does the Night's Tide work in Elden Ring Nightreign?
The Night's Tide is a shrinking boundary of blue flame that closes inward from the map edges, dealing damage to any player caught outside its safe zone. It first begins contracting at around the 4:30 mark and accelerates again at around 11 minutes, closing in fully on the Night Boss arena shortly after. Taking minor damage from the early contraction is survivable with flasks; once the accelerated shrink hits, damage becomes frequent and heavy and should not be tanked. After each Night Boss is defeated, the Night's Tide resets for the next day.
Where are the Sites of Grace in Elden Ring Nightreign?
Sites of Grace appear at fixed points on the Limveld map and are revealed on the map screen at the start of an expedition. Additional Sites of Grace spawn after defeating Night Bosses at the end of Days 1 and 2. In the Spirit Shelter hub (accessed via teleporter after the Day 2 Night Boss), there is also a permanent Site of Grace used for final levelling before the Nightlord fight. Visiting a Site of Grace recharges flasks, recovers HP and FP, clears ailments, and is also the point at which the death gauge resets in multiplayer runs.
Where are the Churches in Elden Ring Nightreign and what do they do?
Churches appear in varying positions across Limveld between runs — their locations are visible on the map at the start of each expedition. Interacting with the altar inside a Church permanently adds one extra charge to your Flask of Crimson Tears for that expedition run. Churches have minimal enemy presence and are among the quickest locations to visit, making them the highest-priority early stop on Day 1. Great Churches are larger variants that also reward Sacred Seals and Stonesword Keys in addition to the flask charge.
What are Shifting Earth events in Nightreign?
Shifting Earth events are map-altering modifiers that replace a corner section of Limveld with a distinct new environment featuring different enemies, bosses, and rewards. Four exist in the base game: The Crater (north, adds a legendary weapon upgrade Special Smithing Table), The Mountaintop (northwest, a crystal near the Ice Dragon's peak grants a Frostbite resistance and attack buff), Rotted Woods (southeast, Scarlet Rot environment with a hidden-flower buff — Favor of the Rotted Woods — that grants Rot immunity), and Noklateo, The Shrouded City (southwest, the Naturalborn of the Void boss grants a one-time resurrection with power boost). Only one manually-selected Shifting Earth can be active per expedition. Deep of Night mode ignores your manual selection, but its map can still randomly roll one of the four on its own.
What is the Spirit Shelter in Elden Ring Nightreign?
The Spirit Shelter is a preparation hub accessed via a teleporter that appears after you defeat the Day 2 Night Boss. It contains a Site of Grace for levelling up with remaining runes, a Smithing Table for final weapon upgrades, and a Merchant for buying consumables. There is no time pressure in the Spirit Shelter — you can take as long as needed to prepare before initiating the Nightlord fight on Day 3. If The Crater Shifting Earth was cleared during the run to unlock legendary upgrades, those tiers are available at the Spirit Shelter Smithing Table.
How do Spectral Hawk Trees work in Elden Ring Nightreign?
Spectral Hawk Trees are located at the four corners of the Limveld map and provide fast-travel style transportation across the map by mounting a Spectral Hawk. Each Hawk follows a visible designated route shown as flowing lines on the map view, connecting the corner trees to each other and to intermediate points. You have limited directional control during flight to deviate slightly from the path. They are most useful early in a day to reach a distant location before the Night's Tide first shrinks, and when the final contraction begins at the 11-minute mark and you need to reach the Night Boss arena quickly.
Do you need Stonesword Keys for Evergaols in Nightreign?
Yes. Each Evergaol in Limveld requires a Stonesword Key to activate the boss encounter. Stonesword Keys can be found in Forts (in a chest inside) and in Great Churches, and are also sold by some merchants. Several Evergaols can appear on a given expedition. Defeating an Evergaol boss always rewards two Dormant Powers: a Rune of the Strong (a lump-sum rune reward that scales up for tougher captured bosses) plus an armament Upgrade item.
Sources
Where the facts on this page were checked. If one of them now says something different, we want to know — tell us and we will fix the guide.
- Limveld Fextralife Nightreign Wiki
- Night's Tide Fextralife Nightreign Wiki
- Evergaol Fextralife Nightreign Wiki
- Shifting Earth Fextralife Nightreign Wiki
- Patch Notes Fextralife Nightreign Wiki
New & updated guides ship every week. Follow the Atom feed or get notified when new Elden Ring Nightreign guides land.