Last updated: 15 September 2026
Monster Hunter Wilds Dual Blades Build Guide — Demon Mode, Elements & Best Skills
Dual Blades are Monster Hunter Wilds's fastest melee weapon — two short blades swung in relentless rapid sequences that hit monsters dozens of times per engagement. That attack density is exactly why they are the game's best elemental weapon: where a Great Sword lands a single massive hit, Dual Blades land twenty moderate ones, and every one of those hits carries your element. Learning to manage Demon Mode, build the Demon Gauge into Archdemon Mode, and always fight with the right element against each monster's weakness is the complete picture of high-level Dual Blades play. This guide explains the three-state stamina system, the key moves in each state, how skills interact with elemental damage, and what builds to run from Low Rank through the Title Update 4 meta. Cross-check the official game wiki if patches have landed after this guide's verified version.
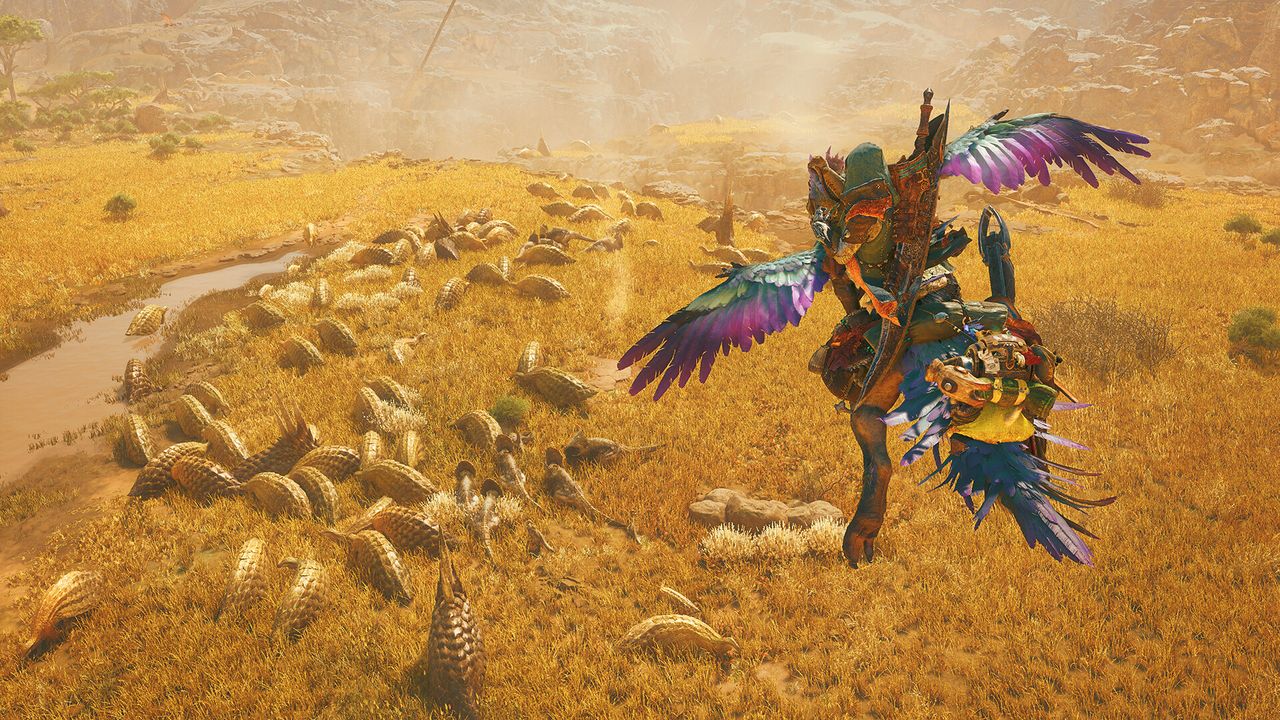
Stay in Demon Mode long enough to fill the Demon Gauge, transition into Archdemon Mode to extend pressure without stamina cost, and always match your element to the monster's weakness. Core skills: Burst, Weakness Exploit, Element Attack Boost, Critical Element, and Marathon Runner.
01Why Play Dual Blades?
Dual Blades trade raw single-hit power for the highest hit rate of any melee weapon in the game. Their three defining strengths:
- Elemental damage output: Because Dual Blades land far more hits per second than any other melee weapon, every point of element on the blade is applied repeatedly. Against a monster weak to your chosen element, the accumulated elemental damage across a full hunt exceeds what a weapon with higher raw but fewer hits can achieve. Matching your element to the monster's weakness is the single highest-impact decision you make in any Dual Blades hunt.
- Constant pressure: Dual Blades never need to wait for a charge window or a stance transition to deal damage. In Demon Mode, every moment you spend on a monster is a moment you are dealing damage — a style that suits hunters who want to stay aggressive and maintain contact with a moving target.
- Mobility in Demon Mode: While in Demon Mode your dodge inputs are enhanced — evasion distance and speed both improve, and a well-timed dodge can trigger Demon Boost Mode, adding a temporary damage bonus on top of an already-elevated state. The weapon rewards aggressive, mobile play that keeps you on the monster at all times.
The trade-off: Dual Blades require active stamina management. Demon Mode's power comes at the cost of a continuously draining stamina gauge, and without skills to support it, your active combat windows shrink significantly. Stamina skill investment is not optional — it is the mechanical foundation that makes everything else possible. If you prefer a weapon with lower stamina demands, the Long Sword Build Guide covers a counter-based weapon with no stamina requirements.
02Demon Mode, Demon Gauge, and Archdemon Mode
Dual Blades have three active states that determine which attacks are available and how much stamina you spend. Managing the transition between them — rather than simply holding Demon Mode permanently until stamina runs out — is the core mechanical skill of the weapon.
Demon Mode (hold R2 / RT): Holding the trigger activates Demon Mode. Your stamina gauge drains continuously for as long as Demon Mode is active. In return, your attack power increases, your movement speed improves, and your evasion frames are enhanced. Critically, every attack you land in Demon Mode contributes to filling the Demon Gauge — the bar visible below your sharpness gauge. The practical goal of Demon Mode is not to fight in it indefinitely, but to fill the Demon Gauge as efficiently as possible and then release into Archdemon Mode before stamina runs out.
Archdemon Mode (Demon Gauge full): Once the Demon Gauge is completely filled, Archdemon Mode activates. In Archdemon Mode your hunter retains the boosted attack power from Demon Mode but no longer pays the stamina drain — you can attack freely without watching your gauge. Archdemon Mode also unlocks empowered attack variants, including Demon Flurry and Demon Flurry Rush, that are unavailable in the Normal state. The Demon Gauge depletes gradually and is consumed faster by Archdemon-exclusive attacks. When it empties, you return to Normal state and must refill it through another Demon Mode cycle.
Demon Boost Mode (perfect evade in Demon Mode): If you time a dodge precisely as a monster's attack lands while you are in Demon Mode, you trigger Demon Boost Mode. This state lasts approximately 12 seconds and provides an additional damage bonus on top of Demon Mode's existing enhancements — both raw and elemental damage increase. The timing requirement is similar to other offset mechanics in Wilds: aim for large, clearly-telegraphed attacks first (roars, wide ground sweeps) and expand to faster attacks as your familiarity with each monster improves.
The practical rhythm: activate Demon Mode at the start of an opening → land rapid hits to fill the Demon Gauge → once the gauge is full or stamina is low, release Demon Mode → continue attacking in Archdemon Mode without stamina cost → when the gauge empties, repeat the cycle. Marathon Runner and Constitution skills extend how long each Demon Mode phase lasts, directly increasing the size and frequency of your Archdemon Mode windows.
03Key Moves and the Blade Dance Loop
Dual Blades' moveset splits naturally across the three states. Understanding which moves belong to each state — and which are exclusive to Archdemon Mode — is the difference between cycling damage correctly and wasting the Demon Gauge.
Core moves available in any state:
- Sixfold Demon Slash: The standard attack chain outside Demon Mode and in Archdemon Mode. Mashing the attack button executes the full six-hit sequence, delivering consistent damage at a fast rate without costing gauge. It is your bread-and-butter output whenever you are not inside Demon Mode and the Demon Gauge is still building.
- Heavenly Blade Dance: A powerful attack available across states that delivers strong raw hits. Its slower execution compared to the rapid-slash chains makes it most useful during monster stagger windows when the target is stationary.
Demon Mode moves (also available in Archdemon Mode):
- Screw Slicer: A directional spinning attack available in Demon Mode and Archdemon Mode with strong repositioning value. Title Update 4 greatly increased its raw damage, elemental scaling, and ailment scaling — it is now a meaningful damage move in its own right rather than purely a positioning tool. In Demon Boost Mode your dodge converts into an attack that chains directly into Screw Slicer. Use it to close distance while dealing damage or shift to a better hitzone mid-combo.
- Blade Dance / Blade Dance II: A flurry of rapid slashes that represents Dual Blades' primary Demon Mode burst attack. The animation can be repositioned between individual strikes, allowing you to track a moving monster mid-sequence. Blade Dance is where Dual Blades' elemental advantage becomes most visible — the flurry of hits, each carrying your element, compounds rapidly against a weak hitzone.
- Demon Dodge: In Demon Mode, your dodge input delivers an enhanced evade with improved frames. A perfectly-timed Demon Dodge triggers Demon Boost Mode for approximately 12 seconds. Treat it as both an evasion tool and a damage-state setup — aim for clear telegraphed attacks and convert the dodge into a Demon Boost window.
Archdemon Mode exclusive moves:
- Demon Flurry / Demon Flurry Rush: Archdemon Mode's primary offensive output. Demon Flurry deals strong damage while consuming the Demon Gauge — use it during openings where you can sustain a full sequence without interruption. Demon Flurry Rush is the extended version with additional hits, ideal for topple windows or long stagger recoveries where you have confirmed the monster cannot respond.
Focus Strike: Turning Tide (Focus Mode): Dual Blades' Focus Strike is Turning Tide — a multi-hit spiral attack that strikes a monster Wound repeatedly. Title Update 4 reduced its sharpness consumption, making it less costly to use frequently. Against a Wound on a weak hitzone, Turning Tide delivers concentrated elemental and raw damage in a single committed sequence. As the Focus Mode and Wounds guide details, aim Focus Strikes at Wounds opened on priority hitzones — the head or forelegs for most monsters — and follow up Turning Tide with Blade Dance or Demon Flurry depending on your current state.
04Elemental Matchups: Dual Blades' Defining Edge
For most weapons, bringing the right element to a hunt is a secondary consideration. For Dual Blades, it is a primary damage decision. The weapon's attack density means element is applied on virtually every hit, and the difference between a correct elemental matchup and a neutral or mismatched one is large enough to define how quickly fights resolve.
The practical consequence: serious Dual Blades hunters build around the ability to match element to each target rather than using a single pair of blades for all content. Two approaches:
- The Artian approach (endgame): The Eternal Cusp (Gogmazios Artian Dual Blades) supports elemental decoration swaps, allowing a single weapon to be tuned to the element most effective against each monster. This is the most material-efficient solution once you have Artian materials — one pair of blades that adapts to any hunt. See the Crafting and Upgrade guide for how the Artian reinforcement system works.
- The dedicated weapon approach (progression): Before Artian materials are accessible, maintain a small collection of element-specific Dual Blades — one per relevant element. A majority of High Rank monsters are weak to Fire or Thunder, making those two elements the priority first. Water, Ice, and Dragon coverage can be added as you encounter their targets. Upgrade each pair consistently along its respective tree — an upgraded named-monster Dual Blades at the correct element outperforms an Artian weapon of the wrong element.
Checking a monster's elemental weakness in your Hunter's Notes before each hunt takes under a minute and meaningfully changes your clear speed. Make it a pre-hunt habit — Dual Blades benefit more from correct element than almost any other weapon because of the higher hit count per hunt. The same discipline applies in the Bow Build Guide, the game's other premier elemental weapon.
05Key Skills to Prioritise
Dual Blades have a larger mandatory skill list than most weapons because they need to support three performance factors simultaneously: stamina management for Demon Mode uptime, elemental damage amplification, and critical hit rate. Understanding which category each skill falls into prevents over-investing in one area at the expense of another.
Stamina management (required for Demon Mode uptime):
- Marathon Runner (3 points): Slows the rate at which Demon Mode drains your stamina gauge. This is the weapon's most essential stamina skill — more stamina time in Demon Mode means more Demon Gauge fills per hunt, which means more Archdemon Mode windows. Target Level 3 before adding offensive skills.
- Constitution (3–5 points): Reduces the fixed stamina cost of stamina-consuming actions. While Constitution is often discussed as the Bow's mandatory skill, it applies equally to Dual Blades — any reduction in stamina expenditure extends Demon Mode uptime. Pair it with Marathon Runner for the most robust stamina foundation.
- Stamina Surge (3 points): Accelerates stamina regeneration during gaps between Demon Mode activations. Faster recovery means shorter pauses before your next cycle. Include it once Marathon Runner and Constitution are at target levels.
Note on Maximum Might: Maximum Might — which boosts Affinity while stamina is full — is a poor fit for Dual Blades. Demon Mode continuously drains your stamina gauge, meaning the full-stamina condition Maximum Might requires is rarely met during combat. Invest those skill points in stamina management skills instead.
Core offensive skills:
- Burst (5 points): Grants an attack and elemental damage bonus after landing a rapid series of consecutive hits. Dual Blades' attack chains trigger Burst's threshold almost immediately — it activates faster and more reliably on this weapon than on any other in the game. It is widely considered the single most important offensive skill for Dual Blades, and should be slotted before any other offensive choice. Unlike some skills that plateau early, Burst keeps scaling all the way to Level 5 — going from Level 3 to Level 5 raises both the raw and elemental bonus by about 50%, so max it out rather than stopping at 3 once decoration slots allow.
- Weakness Exploit (3–5 points): Increases Affinity when hitting monster weak hitzones, with an additional bonus when striking Wounds. Dual Blades naturally target weak spots at speed — Focus Strike: Turning Tide and Blade Dance both land on whatever hitzone you aim them at. With Burst and Weakness Exploit active simultaneously, your critical hit rate against wounded weak hitzones is high enough to make Critical Boost a substantial multiplier.
- Element Attack Boost (3–5 points): Directly increases elemental damage output. Because element is Dual Blades' primary damage source, Element Attack Boost scales disproportionately on this weapon compared to raw-focused weapons like Great Sword. There are five versions of this skill — one per element — and you apply the version matching your currently-equipped Dual Blades. Endgame builds stack this as high as decoration slots allow.
- Critical Element (3 points): Increases the elemental component of critical hits specifically. Combined with high Affinity from Weakness Exploit and Agitator, a large proportion of your rapid hits become critical hits that also carry amplified element — the compounding of Critical Element and high crit rate is the reason Dual Blades reach their highest damage potential in endgame builds.
- Agitator (3–5 points): Boosts both Attack and Affinity when the monster is enraged. Endgame monsters spend a significant portion of each hunt enraged, making Agitator's bonus nearly constant in practice. It stacks with Weakness Exploit on enraged and wounded targets.
- Critical Boost (3 points): Increases raw critical hit damage. Once your critical rate is consistently high through Weakness Exploit and Agitator, every rapid hit that crits benefits from Critical Boost. Add it once the elemental and affinity foundation is in place.
Defensive and secondary skills:
- Antivirus (3 points, via Sane Jewel decorations): Speeds up recovery from Frenzy infection and grants a conditional Affinity bonus after overcoming it. Most valuable in Gore Magala hunts and any content where the Frenzy blight is inflicted. The Affinity bonus only activates if the monster can inflict Frenzy — slot Sane Jewels situationally rather than permanently.
- Health Boost (3 points): Non-negotiable for Arch-Tempered content. Dual Blades' aggressive close-range playstyle means you absorb attacks that more cautious weapons would avoid. A larger HP pool prevents carts on hits that would otherwise be one-shots at AT-tier.
06Progression Builds: Low Rank to High Rank
Dual Blades are accessible at any rank — the core loop of activating Demon Mode, landing rapid hits, and extending into Archdemon Mode is the same at Low Rank as in endgame. Upgrade your element weapon consistently and get Marathon Runner active as soon as decorations allow.
Low Rank (HR 1–15):
- Weapon: Any Dual Blades from the first large monsters give workable starting damage. Upgrade along the available craft tree using Bonepile and monster materials — a fully upgraded Low Rank pair outperforms an unupgraded High Rank one. Even at Low Rank, equip a Dual Blades with an element if one is available and check the target's weakness before the quest. The habit of element-matching starts here.
- Armor: Full Bone or early-monster mix sets. At Low Rank skills matter less than weapon upgrade level. If any armor piece offers Marathon Runner or Constitution naturally, prioritise it.
- Skill goal: Marathon Runner Level 1 via decorations or natural armor as soon as possible. Even a single point meaningfully extends your Demon Mode windows and reduces the frequency of being caught with an empty stamina gauge mid-combo.
High Rank (HR 15–50+):
- Weapon strategy: Begin building your element library. High Rank opens elemental Dual Blades aligned with the monsters you will be farming most. Prioritise a Fire and Thunder pair first — these two elements cover the weaknesses of a majority of High Rank monsters. Upgrade each pair fully along its craft tree before farming the next element.
- Armor target: The Guardian Ebony Odogaron full armor set is a strong and accessible midgame choice for Dual Blades. Its set bonus activates Burst Boost, which extends the active duration of the Burst skill effect — translating directly into longer windows of elevated elemental and attack damage. Build toward this set as soon as the materials are available and run it until Gogmazios and Artian options open up.
- Skill priorities in order: Marathon Runner 3 → Burst 3 → Weakness Exploit 3 → Constitution 3. Once these four are active, add Element Attack Boost for your current element with remaining decoration slots.
07Endgame Build: TU4 Meta
The Title Update 4 Dual Blades meta converges on the Eternal Cusp (Gogmazios Artian Dual Blades) as the benchmark weapon, supported by an armor set that provides the elemental and offensive skill density Dual Blades need. See the Crafting and Upgrade guide for how the Artian reinforcement system works — this section focuses on skill goals rather than the crafting process.
Weapon — Eternal Cusp (Gogmazios Artian Dual Blades): The top TU4 weapon for Dual Blades. The Gogmazios Artian base delivers strong raw plus group-skill passive benefits in multiplayer, and the weapon's decoration slots support elemental infusion for swapping the active element per hunt — the key feature that makes one pair of blades viable across all endgame content. If Artian materials are unavailable, maintain a library of fully-upgraded named-monster Dual Blades at each element, as discussed in the elemental matchup section above. Element alignment matters more than chasing an Artian weapon with the wrong element.
Armor — Gogmazios foundation:
- The Gogmazios Mail α and Gogmazios Coil α are confirmed as core endgame pieces for their decoration slot efficiency and contribution to the offensive skill suite. Build the chest and waist from Gogmazios armor and fill the remaining slots with pieces that maximise Weakness Exploit, Element Attack Boost, and Burst values via natural skills and decoration slots.
- Common configurations mix Gogmazios pieces with Gore Magala and Arkveld armor. Gore Magala pieces activate the Black Eclipse set bonus — which boosts Attack and Affinity after overcoming Frenzy infection — in qualifying builds. Whether to include Gore pieces depends on how many Sane Jewels you have to manage the Frenzy interaction. If Frenzy management feels unwieldy, lean on Gogmazios and Arkveld pieces for a more consistent active-skill profile.
- Regardless of specific slot choices, the target skill set for endgame Dual Blades is: Burst 5, Weakness Exploit 3–5, Element Attack Boost 3–5 (matching your blade's element), Critical Element 3, Agitator 3–5, Critical Boost 3, Marathon Runner 3. Fill remaining decoration slots with Constitution, Stamina Surge, and Health Boost for Arch-Tempered content readiness.
For Arch-Tempered content (HR 50+): Maintain Health Boost Level 3 and Stun Resistance Level 3 as non-negotiable slots. Dual Blades' in-your-face combat style at AT difficulty means one stun at the wrong moment can cost you a cart — stun immunity and extra HP are worth more than marginal DPS gains from offensive comfort skills at that tier. Note that the first Arch-Tempered monsters unlock at HR 50 (Rey Dau, Uth Duna); the hardest AT encounters — including Arch-Tempered Arkveld — require HR 100.
FAQ
Are Dual Blades good in Monster Hunter Wilds?
Yes — Dual Blades are strong throughout all content tiers, from Low Rank through Arch-Tempered endgame. They are the best weapon in the game for elemental damage, and their attack density means the Burst skill activates more reliably on Dual Blades than on any other weapon. They require active stamina management through skills like Marathon Runner and Constitution, but once those are slotted the weapon is fully capable at every tier. In multiplayer, a Dual Blades hunter running the right element against a weak spot contributes consistent, sustained damage that complements any team composition.
How does Demon Mode work in Monster Hunter Wilds?
Demon Mode is activated by holding R2 (PlayStation) or RT (Xbox). While active, your stamina gauge drains continuously, but your attack power, movement speed, and evasion frames all increase. More importantly, every hit you land in Demon Mode fills the Demon Gauge — a bar visible below your sharpness gauge. When the Demon Gauge is full, you enter Archdemon Mode: the same boosted attack power as Demon Mode but without the stamina drain, plus exclusive empowered attacks like Demon Flurry. The goal is to use Demon Mode as a gauge-filling tool, then sustain pressure for free in Archdemon Mode until the gauge empties and the cycle repeats.
What is the best skill for Dual Blades in Monster Hunter Wilds?
Burst is widely considered the single most important offensive skill for Dual Blades. It grants an attack and elemental damage bonus after landing multiple consecutive hits — a threshold Dual Blades meet almost instantly given their attack speed. For stamina management, Marathon Runner at Level 3 is equally essential — without it, Demon Mode drains your gauge too quickly to maintain meaningful uptime. If you can only slot two skills to start, Burst and Marathon Runner are the pair that makes everything else work.
Do I need elemental Dual Blades or can I use one pair for everything?
In endgame, the Eternal Cusp (Gogmazios Artian Dual Blades) supports elemental decoration swaps, effectively making one pair serve all content. During High Rank progression before Artian materials are available, you need multiple elemental pairs — at minimum a Fire and Thunder set, which together cover the weaknesses of most High Rank monsters. The damage gap between correct element and neutral element is large enough on Dual Blades that fighting with the wrong element is a meaningful disadvantage, unlike on raw weapons where element is secondary. Build Fire and Thunder first, then add Ice, Water, and Dragon coverage as you progress.
What is Archdemon Mode and how is it different from Demon Mode?
Archdemon Mode activates automatically when you fill the Demon Gauge completely by attacking in Demon Mode. In Archdemon Mode, you retain Demon Mode's boosted attack power but pay no stamina drain — you attack freely without watching your gauge. It also unlocks Demon Flurry and Demon Flurry Rush, empowered attacks that are unavailable in the Normal state. The Demon Gauge depletes gradually and is consumed by Archdemon-exclusive attacks; when it empties, you return to Normal state and must refill it through another Demon Mode cycle. Managing this cycle efficiently — filling the gauge quickly in Demon Mode and spending the Archdemon window fully — is the core mechanical skill of the weapon.
Is Dual Blades good for beginners in Monster Hunter Wilds?
Dual Blades are mechanically approachable but have a moderate learning curve. The core loop is simple — activate Demon Mode, hit the monster rapidly, let the gauge fill — but managing stamina across a long hunt, learning when to cycle out of Demon Mode before exhausting your gauge, and building the habit of matching element to each monster's weakness all layer on top. The weapon's fast attack speed makes it forgiving in terms of timing precision compared to charge-based weapons. If you enjoy constant aggressive pressure and the idea of elemental matchup planning, Dual Blades are an excellent choice. The Best Beginner Weapons guide covers the full range of first-weapon options if you are still deciding.
Sources
Where the facts on this page were checked. If one of them now says something different, we want to know — tell us and we will fix the guide.
- Dual Blades Fextralife
- Eternal Cusp Fextralife
- Burst Fextralife
- Weakness Exploit Fextralife
New & updated guides ship every week. Follow the Atom feed or get notified when new Monster Hunter Wilds guides land.