Last updated: 5 September 2026
Monster Hunter Wilds Bow Build Guide — Coatings, Dash Dancing & Best Skills
The Bow is Monster Hunter Wilds's fastest-paced ranged weapon — a rhythmic loop of charged shots, directional dashes, and carefully timed evasions that rewards hunters who learn its stamina engine. Where Bowguns sit back and control space, the Bow closes in to a precise optimal range and converts every dodge into a resource advantage. This guide covers the Bow's charge and coating mechanics, how Discerning Dodge turns a monster's attack into a free reload, and what builds to run from Low Rank all the way through the Title Update 4 meta. Cross-check the official game wiki if patches have landed after this guide's verified version.
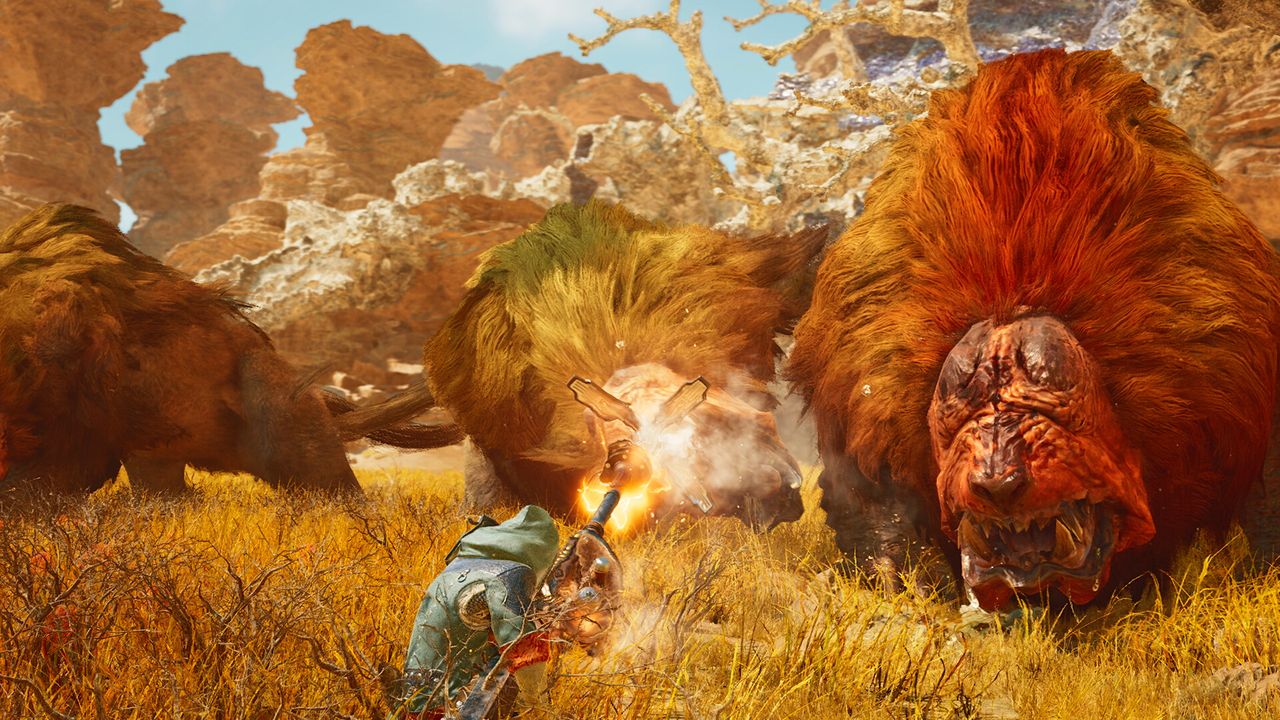
Charge your shot to the highest available level, maintain it through Dash Dancing, and always match your coating element to the monster's weakness. Core skills: Constitution, Stamina Surge, Weakness Exploit, and Critical Element.
01Why Play Bow?
The Bow sits at the intersection of ranged safety and melee-like aggression. Its three defining strengths:
- Elemental flexibility: Bow damage scales exceptionally well with element. Matching your coating element to a monster's weak hitzones delivers a larger damage uplift per hunt than almost any other weapon — running the right element can mean 30–50% more effective damage compared to a neutral matchup.
- Constant mobility: Every combat action can be immediately followed by a directional dash that keeps your shot charged. Compared to weapons where committing to an attack roots you in place, the Bow lets you reposition every fraction of a second — a significant advantage against fast or mobile monsters.
- Discerning Dodge upside: Unlike weapons where a monster's attack is purely a threat to dodge, the Bow converts a perfectly-timed Side Step into an active reward: stamina and coating meter are restored simultaneously. A Bow hunter who times evasions well effectively gets free coatings, making aggressive play self-sustaining.
The trade-off: the Bow demands significant stamina investment through skills — without Constitution and Stamina Surge slotted, your charged shots and dashes rapidly drain your stamina gauge and force you to stop attacking. Stamina management is not optional for this weapon. If you prefer a less resource-intensive playstyle, the Best Beginner Weapons guide covers melee options that do not require a stamina skill budget.
02Charge Levels and Dash Dancing
The Bow's damage output depends entirely on what charge level you fire at. Understanding the four levels and how to maintain the highest one is the foundation of the weapon.
Achieving Level 3 or 4 and then maintaining that charge through Dash Dancing is the core combat loop:
- Hold your charge button until Level 3 (or 4 with Bow Charge Plus).
- Dash in any direction (using your evade button). A dash immediately after a charged shot preserves your current charge level — you do not need to recharge from zero after moving.
- Fire the instant the dash completes. Power Shot into Power Volley are your primary hits at close-to-optimal range.
- Dash again immediately. Repeat — dash → fire → dash → fire — until your stamina drops low.
- Use Discerning Dodge or a moment of rest to recover stamina, then resume the loop.
Critical Distance is the range at which Bow arrows deal peak damage — roughly five to ten metres. Too close and arrows underperform; too far and damage falls off. Dash Dancing naturally keeps you at this range as you orbit around the monster during a hunt.
03Coatings, Discerning Dodge, and Stamina Economy
The Bow's damage is amplified by coatings — consumable buffs applied to your arrows before firing. Managing your coating supply and stamina simultaneously is the mechanical challenge that separates average and strong Bow players.
Coating types:
- Power Coatings: The primary raw-damage coating. Applied before a burst sequence, they substantially increase the damage of each arrow. Carry a full supply into every hunt and reload during safe windows (topples, roars) when your stock runs low.
- Close-Range Coatings: An alternative for hunters who prefer staying at very close range. They offer a different damage profile than Power Coatings at minimal distance — worth experimenting with if your playstyle is extremely aggressive, but Power Coatings are the default recommendation.
- Elemental coatings (Poison, Paralysis, Blast, Sleep): Utility options. Blast coatings in particular can add consistent status damage on top of your elemental Bow's output. These are secondary to your main damage coating — carry a handful as supplemental tools rather than your primary stock.
Discerning Dodge: If you perfectly time a Side Step precisely as a monster's attack or roar would hit you, you activate Discerning Dodge. The result is two simultaneous rewards: stamina is restored and your coating meter is refilled. This is the Bow's signature defensive mechanic — reading the monster well converts attacks that would punish other weapons into free resources for continued aggressive play. Practice timing it against large, clearly-telegraphed attacks (roars, ground slams, wide sweeps) first, then expand to faster patterns as your read improves.
The practical effect: a Bow hunter who lands regular Discerning Dodges rarely runs out of stamina or coatings mid-hunt. The loop becomes self-sustaining, and the stamina skill investment (Constitution, Stamina Surge) serves as your safety net for the times you miss the timing.
04Elemental Matchups: The Bow's Biggest Edge
For most weapons, bringing the right element to a hunt provides a modest bonus. For the Bow, it is a primary damage multiplier — the difference between a neutral-element and correct-element Bow against a weak hitzone is large enough to define how quickly fights resolve.
The practical consequence: endgame Bow hunters build around the ability to match element to each monster rather than using a single weapon for all content. Two approaches:
- The Artian approach (endgame): The Gogma Artian Bow (Calamitous Angel) supports elemental decoration swaps, allowing a single weapon to be tuned to the monster you are facing. This is the most efficient solution once you have Artian materials — one weapon that adapts to any hunt.
- The dedicated weapon approach (progression): Before Artian materials are accessible, maintain a small collection of element-specific Bows — one per relevant element. Viable named-monster options for each element exist throughout High Rank: Dark Filament for Fire, Heaven's Manna for Water, High Voltsender for Thunder, Singha Sharanga for Ice, and Verzweiflung for Dragon. You do not need all five immediately — cover the elements of the monsters you are currently farming and expand the collection as you progress.
Checking a monster's elemental weakness before a hunt (via the Hunter's Notes or a community resource) takes thirty seconds and can meaningfully change your clear speed. Make it habitual.
05Key Skills to Prioritise
The Bow's skill list divides cleanly into two mandatory categories — stamina management and offensive amplification — plus several weapon-specific additions:
Stamina management (mandatory pair):
- Constitution (3–5 points): Reduces the fixed stamina cost of each dash and charged shot. This is the skill that makes the Dash Dancing loop viable — without it, your stamina gauge depletes before you can complete a meaningful combo. Target at least Level 3 in mid-game; endgame builds push to Level 5. Non-negotiable for any Bow set.
- Stamina Surge (3 points): Accelerates the rate at which stamina regenerates between actions. Pairs directly with Constitution to reduce both the consumption side and increase the recovery side of your stamina equation. Max this before adding comfort skills.
Core offensive skills:
- Weakness Exploit (up to 5 points): Increases Affinity when hitting monster weak hitzones (up to +30%, plus an extra +20% on wounds, at level 5). Bow arrows naturally strike precise locations, and Focus Mode targeting makes weak-point aim consistent — this skill activates continuously in practice. Highest-priority offensive skill after the stamina pair.
- Agitator (up to 5 points): Boosts both Attack (up to +20) and Affinity (up to +15%) when the monster is enraged. Endgame monsters spend much of the hunt in this state, making Agitator an efficient and near-constantly active damage multiplier.
- Critical Boost (up to 5 points): Increases raw critical hit damage, scaling with each level to its cap at level 5. Once Weakness Exploit and Agitator push your Affinity comfortably positive, each critical hit is worth considerably more — Critical Boost amplifies every one of them.
- Critical Element (3 points): Increases elemental damage dealt on critical hits specifically — this skill caps at level 3. Because the Bow is an elemental weapon and should be running high critical uptime through Weakness Exploit and Agitator, Critical Element directly multiplies your element output. Include it in any elemental Bow set.
Weapon-specific and secondary skills:
- Bow Charge Plus (unlocks Level 4 charge): The single most impactful weapon-specific skill for Bow. A Level 4 overcharge delivers the highest per-shot damage of any charge tier and is treated as essential in every current meta build — there is no reason not to include it in any serious Bow build.
- Burst (up to 5 points): Triggers a damage bonus after landing multiple hits in quick succession. Bow Power Shot and Power Volley sequences hit repeatedly in a short window, making Burst activate reliably without any additional effort. Meta builds commonly run it at level 3-4.
- Antivirus (3 points, from Sane Jewels decorations): Speeds up recovery from the Frenzy blight and grants an Affinity bonus (up to +10% at Level 3) after you overcome the Frenzy infection. The bonus is conditional — it requires you to be infected by Frenzy and then cure it; without Frenzy-inflicting monsters in a hunt there is no Affinity gain from Antivirus. Most valuable in Gore Magala hunts and any content where Frenzy is inflicted; slot it via Sane Jewel decorations when you know the target can inflict Frenzy.
- Special Ammo Boost (1–2 points): Increases the damage of Dragon Piercer — the Bow's heavy special shot. Dragon Piercer is most valuable when a monster is toppled or during long stable attack windows; boosting its damage at 1–2 points is worthwhile without requiring the full budget of other priority skills.
- Health Boost (3 points): Mandatory for Arch-Tempered content. The Bow's evasion-based defence is strong but not perfect — a larger HP pool provides necessary margin against AT-tier one-shot attacks.
06Progression Builds: Low Rank to High Rank
The Bow benefits enormously from correct element, but the early game does not require chasing perfect elemental matchups. Focus on keeping your Bow upgraded and building your stamina skill foundation.
Low Rank (HR 1–14):
- Weapon: Any Bow from the first large monsters you face (Doshaguma, Balahara) gives you workable early damage. Upgrade consistently along the craft tree using available Bonepile and monster materials — a fully upgraded Low Rank Bow outperforms an unupgraded High Rank one.
- Armor: Full Bone or early-monster mix sets. The skills matter less than weapon sharpness management at this stage. If any armor piece offers Constitution or Stamina Surge naturally, prioritise it.
- Skill goal: Constitution Level 1–2 via decorations or natural armor skills as soon as possible. Even partial stamina reduction noticeably extends your Dash Dancing windows.
High Rank (HR 15–50+):
- Weapon strategy: Begin building your element library. The Prominence Bow I and then Entbehrung I (or equivalent named-monster Bows available for your current element targets) serve as strong High Rank workhorses. Upgrade the element that covers the monsters you need to farm — usually Fire and Thunder cover the most High Rank content.
- Armor target: A mix of Gore Magala and Guardian Arkveld pieces is a recognised strong midgame combination that delivers Weakness Exploit, Agitator, and good decoration slot counts together — enough to slot in Critical Boost and Constitution decorations as you acquire them.
- Skill priorities in order: Constitution 3 → Weakness Exploit 3 → Stamina Surge 3 → Critical Boost 3. Once these four are active, add Agitator with remaining decoration slots.
07Endgame Build: TU4 Meta
The Title Update 4 Bow meta converges on the Calamitous Angel (Gogma Artian Bow) and two competing armor configurations depending on playstyle priority.
Weapon: The Calamitous Angel is the benchmark TU4 Bow. Its Gogma Artian base provides high raw plus group-skill passive benefits, and its decoration slots support elemental infusion for swapping element matchups per hunt. If Artian materials are unavailable, the named-monster elemental Bows listed in the elemental matchup section above are strong placeholders — element alignment matters more than chasing an Artian weapon with the wrong element.
Build Option 1 — Gore Lord's Soul (highest sustained DPS):
- Armor: Udra Mirehelm γ (Head), Udra Miremail γ (Chest), Gore Vambraces β (Arms), Gore Coil β (Waist), Gore Greaves β (Legs).
- Set bonuses active: Black Eclipse II (grants a scaling Affinity bonus for curing the Frenzy virus — stacks further with Antivirus) and Guts (Tenacity), the survival-focused group skill that lets you no-sell one otherwise-lethal hit per activation.
- Skill profile: Agitator 5, Constitution 5, Antivirus 3, Burst 3, Counterstrike 3, Stamina Surge 2, plus small amounts of Evade Window and Flinch Free for comfort. Fill remaining decoration slots with Critical Element and Weakness Exploit.
Build Option 2 — Gogmazios Elemental Rotation (best for element swapping):
- Armor: G. Ebony Helm β (Head), Gogmazios Mail β (Chest), G. Rathalos Vambraces β (Arms), Gogmazios Coil α (Waist), Gogmazios Greaves α (Legs).
- Set bonus active: Mutual Hostility — a flat plus percentage boost to elemental damage that scales with how many Gogmazios pieces you wear, plus a small damage barrier that absorbs chip damage while it's active.
- Skill profile: Constitution 5, Peak Performance 4, Burst 4, Agitator 4, Charge Master 3, Weakness Exploit 3+. This is the build to run if you want to swap the Calamitous Angel's element to match whatever you're hunting rather than committing to one Frenzy-focused loadout.
- This build trades Build Option 1's Frenzy-cure Affinity bonus for pure elemental scaling — pick it when your target has a clear elemental weakness rather than relying on affinity stacking.
For Arch-Tempered content (HR 100+): Maintain Health Boost Level 3 and Stun Resistance Level 3 as non-negotiable slots. AT-tier attacks hit hard enough that comfort skills prevent carts more reliably than marginal offensive upgrades — losing a quest from one unlucky stun costs more time than a slightly lower sustained DPS.
FAQ
Is Bow good for solo play in Monster Hunter Wilds?
Yes — Bow is one of the strongest solo weapons in Wilds. Its high mobility lets you reposition freely without coordinating with other hunters, element swapping is always under your control, and Discerning Dodge means you convert monster attacks into resources rather than purely avoiding them. The stamina management demand is higher solo (no support hunters), but once Constitution and Stamina Surge are slotted, the weapon is fully self-sufficient. In multiplayer, the Gogma Artian group-skill passive adds a bonus for the whole party on top of your own output.
What is the difference between Power and Close-Range coatings for build purposes?
Power Coatings are the default recommendation — they add a substantial raw-damage multiplier to every arrow and are effective at the Bow's natural critical distance (roughly five to ten metres). Close-Range Coatings offer an alternative for hunters who prefer staying at extremely close range, closer than the standard critical distance. For most builds and skill levels, Power Coatings provide better results with less positioning precision. Both require topping up from your item pouch during hunts; Discerning Dodge also restores your coating meter, rewarding timed evasions.
Do I need a separate Bow for every element?
In endgame, a single Gogma Artian Bow with elemental decoration swaps covers most hunts efficiently. During progression (High Rank, pre-Artian), maintaining two or three dedicated elemental Bows — covering Fire, Thunder, and Ice as a baseline — is practical. Fire and Thunder between them cover the weaknesses of a large majority of High Rank monsters. Dragon and Water Bows can be added as you encounter monsters weak to those elements. You do not need all five day one; build the collection incrementally alongside your progression.
What is Discerning Dodge and how do I use it?
Discerning Dodge activates when you perfectly time a Side Step so the dodge frame coincides with a monster's attack or roar. The reward is immediate: your stamina and coating meter are both restored at once. Treat it the same way Long Sword hunters treat the Foresight Slash — an input you aim for when you see a clearly telegraphed attack, not a reactive emergency dodge. Large roars, wide sweeps, and predictable ground slams are the easiest attacks to time it against. Landing it consistently makes the Bow's stamina and coating management nearly self-sustaining.
Do I need specific armor or can I use any high-defense set for Bow?
Any armor works for casual content, but Bow's performance is unusually skill-dependent compared to most weapons. Without Constitution at 3+ and Stamina Surge, your Dash Dancing loop stalls constantly and damage output drops significantly. The good news: these are widely available via decorations, so you are not locked to specific armor pieces early on. Endgame builds are more structured — the Gore and Gogmazios armor pieces provide the Black Eclipse and Mutual Hostility set bonuses that deliver the highest TU4 damage, and general high-defense armor without those bonuses will fall noticeably behind.
What is Bow Charge Plus and is it worth a skill slot?
Bow Charge Plus is a one-point skill that unlocks the Level 4 overcharge — the Bow's highest-damage charge tier, which is not available at all without this skill. It is always worth taking. One decoration slot for a meaningful and permanent damage ceiling increase is one of the most efficient investments in any Bow build. Slot it as soon as you have a free Level-2 or Level-3 decoration slot.
Is Bow hard to learn compared to other weapons?
The Bow has a moderate-to-high learning curve. The combat motions are straightforward — charge, dash, fire — but stamina management, critical-distance awareness, elemental matchup planning, and Discerning Dodge timing all layer on top of each other. The weapon rewards methodical practice: spend fifteen minutes in the Training Area establishing the Dash Dancing rhythm, then take it into an easy hunt to internalise critical distance. Discerning Dodge can be left as a bonus rather than a crutch until the core loop feels automatic. Most hunters find the Bow fully functional within two to three hunts.
Sources
Where the facts on this page were checked. If one of them now says something different, we want to know — tell us and we will fix the guide.
- Weakness Exploit Fextralife Wiki
- Critical Boost Fextralife Wiki
- Agitator Fextralife Wiki
- Constitution Fextralife Wiki
- Critical Element Fextralife Wiki
- Stamina Surge Fextralife Wiki
- Burst Fextralife Wiki
- Best Bow Builds for High Rank Game8
- Monster Hunter Wilds Bow Builds 2026: Elemental Meta, Impact Coatings, and Safe-Zone Dominance Switchblade Gaming
- Best Bow Builds for Monster Hunter Wilds 2026: Ranged DPS Meta Guide WildsBuilder
New & updated guides ship every week. Follow the Atom feed or get notified when new Monster Hunter Wilds guides land.