Last updated: 5 September 2026
Subnautica 2 DNA Modification Guide — Biomods, Bioscanner & Best Picks
Subnautica 2 is not the original Subnautica. The alien ocean you have landed in has its own biology, and the game expects you to adapt to it — literally. The Biomod system is the mechanic that sets Subnautica 2 apart from its predecessors: by scanning the planet's creatures with the Bioscanner, you unlock biological modifications that alter your own capabilities. Better oxygen management. Faster movement near surfaces. Bioluminescence in total darkness. Creature-deterring electric shocks. This guide covers every step — finding and crafting the Bioscanner, building the Biolab, choosing the modifications that matter most, and using the system effectively in both solo and co-op.
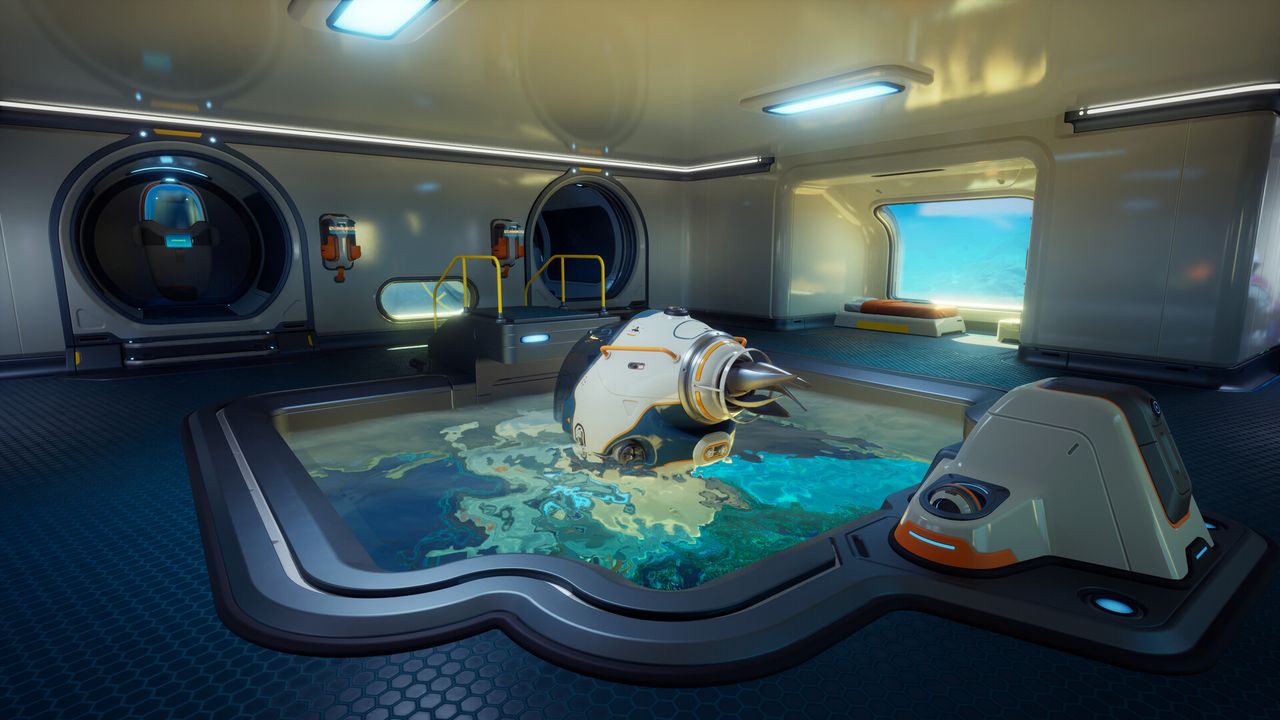
The Biomod system lets you scan alien creatures with the Bioscanner to unlock biological upgrades called biomods. Six biomods are now unlockable from Biolabs found throughout the world: four defaults — Dash, Pathfinder, Sea Skimmer, and Oxygen Control — from the Welcome Center Biolab, plus one each from the Biolabs in Coral Gardens and Axum Ruins. Every other biomod requires scanning its source creature with the Bioscanner. You start with one active and one passive slot; up to 4 more passive slots unlock at 10/20/40/80 total Bioscanner scans. Swap freely at any Biolab for no cost.
01What the Biomod System Is — and Why It Matters
Biomods are biological upgrades that modify your capabilities as a player. Where the original Subnautica progressed your abilities almost entirely through equipment — better tanks, better suits, better vehicles — Subnautica 2 adds a parallel track: you adapt your own biology to the alien ocean. Biomods are divided into two types:
- Active biomods are manually triggered abilities — a burst dash to dodge predators, a bait cloud to distract them, a sonar pulse to find resources. You activate them on demand.
- Passive biomods are always-on effects when equipped — faster swimming near surfaces, reduced oxygen consumption when stationary, self-illumination in darkness, invisibility while motionless.
You start with one active biomod and one passive biomod slot. Since update 1.1 'Adaptive Measures', additional passive Biolab slots unlock as your total Bioscanner scan count rises: slot 2 at 10 scans, slot 3 at 20, slot 4 at 40, and slot 5 at 80 — the Biolab interface tracks your running total above the passive slots. You can swap your equipped choices freely at any Biolab at no cost.
There are 15 biomods in the current build: 5 active and 10 passive. Four unlock automatically the first time you access a Biolab. The remaining 11 each require scanning a specific creature with the Bioscanner tool.
02Getting the Bioscanner
The Bioscanner is the tool used to scan alien creatures and unlock their corresponding biomods. It is not available from the start — you need to find its blueprint fragment before you can craft it. The blueprint fragment is found in the Cicada Wreck (EVA Prep) in the Karakorum Ruins region, on the southern edge near the Karakorum Power Plant. You will need the Repair Tool to advance through the wreck to reach it.
Once you have the blueprint, craft the Bioscanner at your Modification Station (not the escape pod Fabricator) using: 1× Scanner, 2× Enameled Glass, and 3× Conduit Crystals. The Modification Station itself must be built first — its blueprint is obtained by scanning a Modification Station at the Research Outpost, and it is assembled via the Habitat Builder using 2× Titanium, 2× Celestine, and 2× Copper.
With the Bioscanner equipped, point it at a living creature and hold the scan button for the scan to complete. Each successful scan immediately unlocks that creature's corresponding biomod in the Biolab — there are no vials, no trips back to base required for processing. The biomod is available to equip the moment the scan finishes.
- Scans are not retroactive. If you previously scanned a creature with the standard Scanner, that data does not count — you must scan it again with the Bioscanner to unlock its biomod.
- Scanning does not harm or kill the creature. For hostile creatures you will need to manage the threat while completing the scan.
- Each creature type only needs to be scanned once. You do not need multiple scans of the same species.
03Building and Using the Biolab
The Biolab is the base module where you equip and swap your active biomods. Its blueprint is unlocked by scanning the powered Biolab inside the Welcome Center — the alien structure located southeast of your Lifepod. One scan unlocks the blueprint immediately. Power the Welcome Center Biolab by inserting a Basic Battery into the wall socket to make it interactive before scanning. As of update 1.1, two additional Biolabs exist in the world at Coral Gardens and Axum Ruins; interacting with each one unlocks an additional default biomod.
Build your own Biolab using the Habitat Builder in the Interior Facilities section. Recipe: 3× Titanium, 1× Copper Wire, 1× Mild Acid. Unlike some interior modules, it is not free to run — it draws about 5 energy per second once placed, so keep it connected to a powered base or it won't function.
Interacting with the Biolab opens a slot panel: one active slot and one passive slot are available. Drag any unlocked biomod into a slot to equip it. Drag a different biomod into an occupied slot to replace it immediately — the previous biomod is deactivated but remains unlocked and can be re-equipped at any time.
- You can build multiple Biolabs in a base. In co-op this lets multiple players swap biomods simultaneously without waiting.
- All Biolabs in a shared base share the same pool of unlocked biomods. Any player can equip any biomod the group has collectively unlocked.
- Swapping biomods is free and instant. Experiment freely — there is no penalty for changing your equipped pair.
04Default Biomods — Your Starting Four
Four biomods unlock automatically when you first access the Welcome Center Biolab. Two more default biomods unlock at the Biolabs in Coral Gardens and Axum Ruins respectively — explore those areas to collect them. The four Welcome Center defaults are strong enough that you will likely keep some equipped long into the game:
Dash (active): A directional burst that propels you away from a threat or hazard. The core panic button for close encounters — works in any direction including upward. Has a roughly five-second cooldown.
Pathfinder (active): Releases a trail of pheromone particles that lingers for four to five minutes and is visible on your HUD. Invaluable in cave systems where it is easy to become disoriented — drop a trail on the way in and follow it back out.
Sea Skimmer (passive): Increases swim speed when you are close to underwater surfaces or the seafloor. Effective for resource gathering runs along the seabed and for moving through cave corridors quickly.
Oxygen Control (passive): Reduces your oxygen consumption by 75 percent when you are not moving. Combine with Dash to reach a safe spot, hold still, and stretch your remaining air significantly. Extremely useful for hiding from predators — stationary behind cover, you barely consume oxygen.
- For your first hours: Oxygen Control (passive) and Dash (active) is the most defensive default pair — it gives you a movement burst and stretches air when hiding.
- Once you start cave exploration, swap active to Pathfinder. The trail prevents the most common cause of early death: running out of oxygen while lost in tunnels.
- Sea Skimmer is more efficient than Oxygen Control during active resource runs on the seafloor. Swap based on what you are doing.
05Bioscanner Biomods — Passive Unlocks
Ten passive biomods require Bioscanner scanning of specific creatures. Below are the most impactful ones and where to find their source creatures. EA build note: creature depths and exact locations are subject to change in patches.
Bioluminescence — source: Sandspear (a hostile ambush predator that buries itself in sand, found in the Shallows near the Lifepod as well as the Overgrown Ruins, Plateaus, and Necrolei Hills) or Electric Geordie. Generates a soft persistent glow from your body in darkness. Frees your held tool slot from needing a flashlight during cave dives. Players report a light source can startle a buried Sandspear into backing off before you scan it — its jaw closes fast enough to hurt if it connects.
Water Secretion — source: Water Slug (a passive mollusc found hiding in anemones across most biomes, including near the Lifepod). Slowly generates water packets passively. Reduces the urgency of fresh water collection in the early game.
Slow Metabolism — source: Nibbler Mango (hostile fish). Reduces food consumption speed by 50% — your food meter ticks down roughly half as often. Pairs well with Dermal Garden if you swap between the two.
Dermal Garden — source: Needler Mango (an aggressive, territorial fish that shoots volleys of needles; found in the Overgrown Ruins and the Needler Nest). Slowly grows nutritious algae on your skin that generates food passively. Useful in deep-dive scenarios where returning to surface for food is inconvenient.
Threat Sense — source: Hoverthorn (a passive, edible fish found in the Karakorum Metal Farms, Karakorum Power Plant, Overgrown Ruins, and Root Canyon). Detects hostile creatures within a 50-metre radius and marks them on the HUD. Dramatically changes how safely you can navigate biomes with Apex predators — you see the threat before it sees you.
Camouflage — source: Bullethead (a swarm predator normally found attached to rock formations and cave walls in the Graveyard, Overgrown Ruins, and Root Canyon). Makes you invisible to predators while you are completely motionless. Combined with Oxygen Control (which stretches air while still), you can hide indefinitely from passing Leviathan-class threats.
Water Retention — source: Coral Crab. Doubles the amount of fresh water you gain from all sources.
Homing Sense — source: Surge Jelly or Hammerhead. Detects powered bases within range and displays a HUD direction indicator. Useful in complex biomes or when returning from a long dive without landmarks.
- For early exploration: Water Secretion (Water Slug, near start) is the easiest unlock — the Water Slug is passive and close to your Lifepod.
- For cave diving: Bioluminescence (Sandspear) is the highest-impact early unlock once you leave the starting area.
- For threat management: Threat Sense (Hoverthorn, Karakorum biomes and Overgrown Ruins/Root Canyon) transforms navigation in predator-heavy biomes.
- For deep-area evasion: Camouflage (Bullethead, Graveyard/Overgrown Ruins/Root Canyon) is the single most powerful defensive passive in the current build.
06Bioscanner Biomods — Active Unlocks
Three additional active biomods require Bioscanner scanning. These expand your active toolkit beyond the default Dash and Pathfinder:
Chum Cloud — source: Toxic Sponge (a defensive, toxin-spraying creature found on cave roofs in the Shallows) or Houndgar. Deploys an orb roughly 10 metres ahead of you that bursts into a radius of distracting bait, drawing predator attention for a while (20-second cooldown between uses). The practical function is predator distraction: throw a Chum Cloud in a direction away from your path, wait for the predator to orient toward it, then pass safely. Also useful as a distraction while scanning a hostile creature — deploy the cloud, let the target investigate it, scan from behind.
Electric Discharge — source: Electric Geordie. Emits an 800-volt shock (10-second cooldown) that deters medium and large predators in your immediate vicinity without damaging them. Players report it does little against apex or Leviathan-class threats, but it reliably repels mid-tier territorial creatures in deeper biomes. Note: cannot be used while inside the Tadpole submersible.
Sonic Echo — source: Collector Leviathan (a leviathan-class apex predator — one patrols above the Karakorum Metal Farms, another lives in a trench in the Sparse Plains). Emits a sonar pulse (10-second cooldown) that highlights nearby ore deposits through terrain and water. The most powerful resource-finding tool in the game, but requires scanning a leviathan-class creature to unlock — this is a late-game unlock for most players.
- Chum Cloud is the most universally useful active unlock. Replace Dash with it once you have it — the predator distraction it provides is more broadly applicable than the burst movement.
- Electric Discharge fills a defensive role in mid-depth biomes where Dash may not carry you far enough to escape a territorial predator.
- Scanning the Collector Leviathan for Sonic Echo is a high-risk, high-reward operation. Approach only with the Tadpole ready for emergency escape.
07Scanning Strategies — How to Collect Biomods Safely
The scanning mechanic is simpler than it might appear: point the Bioscanner at a living creature and hold the scan button. A single scan of each species is all you need. The biomod unlocks instantly — no vials, no return to base required. The main challenge is getting close enough to hostile creatures to complete the scan without taking damage.
For passive creatures (Water Slug, Hoverthorn): Approach slowly from below or behind. Most small creatures scatter if you swim directly toward them at speed. Slow, angled approaches work far better. If the creature flees, follow at a walk — chasing at full speed will scatter them further.
For hostile shallow-area creatures (Sandspear): The Sandspear burrows and ambushes, and its bite closes fast enough to hurt. Players report that shining a light on a buried one can startle it into backing off. Scan quickly and back off. Once you unlock Chum Cloud, you can distract it first.
For hostile mid-depth creatures (Needler Mango, Bullethead): Use the Chum Cloud biomod once you have it. Deploy a cloud away from your scanning position, approach from behind while the creature investigates it, and complete the scan during that window. Retreat to a vehicle after each attempt if the creature resets.
For Apex targets (Collector Leviathan): There is no fully safe approach — the Collector can grab and instantly kill a player on foot, and it can also grab, throw, or swipe at the Tadpole for heavy damage. Get within range, scan (it takes only a few seconds), and immediately put distance between you and the Leviathan. Leviathan-class creatures are not reliably deterred by any biomod in the current EA build.
- You only need to scan each species once — one Sandspear in one dive unlocks Bioluminescence permanently.
- Electric Discharge cannot be used as a self-defense tool while scanning (it knocks you back and resets your approach). Use Chum Cloud or Dash for escape instead.
- If a creature flees your scan attempt, note the location and return later with Chum Cloud equipped — the distraction window makes most hostile scans significantly easier.
08Co-op Specialisation — Splitting Biomod Roles
In co-op sessions, the Biomod system creates natural role specialisation. Each player has their own pair of biomod slots and unlocks biomods independently — scanning by one player does not unlock a biomod for another. However, all players can equip any biomod they have personally unlocked, and all Biolabs in a shared base are accessible to all players.
A common two-player specialisation: one player runs Chum Cloud (active) + Threat Sense (passive) as the threat-manager — they distract predators during sampling and call out approaching threats. The other runs Pathfinder (active) + Bioluminescence (passive) as the explorer — they mark routes in caves and provide ambient lighting during joint dives.
For four-player sessions: an explorer pair (Bioluminescence + Sonic Echo for resource finding), a defensive pair (Camouflage + Electric Discharge for holding position near predator zones), and flexible swap across both Biolabs as the dive changes context.
- Both players in a pair need to independently scan the Collector Leviathan to both have Sonic Echo available. Co-ordinate the scan — one player distracts while the other completes it, then switch.
- All Biolabs in a shared base are accessible to all players. Build at least two Biolabs so players can swap simultaneously without blocking each other.
- Active biomod cooldowns are per-player. Both players having Chum Cloud means double the distraction rate during aggressive-creature dives.
FAQ
How do you unlock DNA modifications in Subnautica 2?
The Biomod system is unlocked in two steps. First, scan the Biolab inside the Welcome Center (southeast of your Lifepod) to unlock the Biolab blueprint, then build one in your base using 3× Titanium, 1× Copper Wire, and 1× Mild Acid — it draws about 5 energy per second once placed, so keep it powered. Second, find the Bioscanner blueprint fragment at the Cicada Wreck (EVA Prep) in the Karakorum Ruins, then craft the Bioscanner at a Modification Station using 1× Scanner, 2× Enameled Glass, and 3× Conduit Crystals. With both tools built, scan creatures with the Bioscanner to unlock their biomods at the Biolab.
What is the best DNA modification (biomod) in Subnautica 2?
For the early game, Oxygen Control (default passive) is immediately impactful — 75% reduced oxygen consumption when stationary lets you hide from threats and stretch air on dives. Once you scan the Sandspear for Bioluminescence, that passive transforms cave navigation. For mid-game, Camouflage (scan the Bullethead, found in the Graveyard, Overgrown Ruins, or Root Canyon) is the strongest defensive passive — complete invisibility while motionless makes Apex predators a non-issue when hiding. For active slots, Chum Cloud (scan Toxic Sponge or Houndgar) replaces Dash once you have it and is more broadly useful.
How many DNA trait slots are there in Subnautica 2?
You start with one active and one passive Biolab slot. As of update 1.1 'Adaptive Measures' (July 2026, unchanged through the current EA 1.2 'Buddy System' build), up to 4 more passive slots unlock as your total Bioscanner scan count rises: slot 2 at 10 scans, slot 3 at 20, slot 4 at 40, and slot 5 at 80. The Biolab interface tracks your running total. Swap between unlocked biomods freely at any Biolab for no cost.
How do you use the Bioscanner in Subnautica 2?
Point the Bioscanner at any living creature and hold the scan button. A single successful scan unlocks that creature's corresponding biomod immediately — there are no vials to fill and no return trip to the Biolab required. Scans are not retroactive: even if you previously scanned a creature with the standard Scanner, you must scan it again with the Bioscanner. Each creature type only needs to be scanned once.
How do you scan aggressive creatures safely in Subnautica 2?
The most effective method is the Chum Cloud biomod (scan Toxic Sponge or Houndgar to unlock it). Deploy it away from your position to draw the hostile creature's attention, then approach from behind during the distraction window and complete the scan. For leviathan-class threats like the Collector Leviathan there is no fully safe option — it can grab and instantly kill a player on foot, and can also grab, throw, or swipe at the Tadpole for heavy damage — so scan quickly and put immediate distance between you and the creature afterward.
Where do you find the Bioscanner blueprint in Subnautica 2?
The Bioscanner blueprint is found as a scan fragment at the Cicada Wreck (EVA Prep), located in the Karakorum Ruins region near the Karakorum Power Plant. You need the Repair Tool to advance through the wreck. Scan the fragment to unlock the blueprint, then craft the Bioscanner at a Modification Station using 1× Scanner, 2× Enameled Glass, and 3× Conduit Crystals.
Is the Biomod system co-op compatible in Subnautica 2?
Yes, but biomods are unlocked per player — scanning a creature unlocks its biomod for the scanner, not the whole group. Each player needs to personally scan source creatures to access each biomod. All players share access to Biolabs in a shared base and can equip any biomod they have individually unlocked. Role specialisation is effective in co-op: different players equipping different biomod pairs creates a more capable team than everyone running identical configurations.
Sources
Where the facts on this page were checked. If one of them now says something different, we want to know — tell us and we will fix the guide.
- Subnautica 2 Adaptive Measures Update Unknown Worlds Entertainment
- Subnautica 2 Buddy System Update Unknown Worlds Entertainment
- Subnautica 2 Updates & Patch Notes Tracker Subnautica 2 Wiki (sub2wiki.com)
- Biomods Subnautica Wiki
- Bioscanner Subnautica Wiki
- Biolab Subnautica Wiki
- Modification Station Subnautica Wiki
- Dash Subnautica Wiki
- Pathfinder Subnautica Wiki
- Welcome Center Subnautica Wiki
- Cicada Wreck (EVA Prep) Subnautica Wiki
- Bioluminescence Subnautica Wiki
- Water Secretion Subnautica Wiki
- Slow Metabolism Subnautica Wiki
- Dermal Garden Subnautica Wiki
- Threat Sense Subnautica Wiki
- Camouflage Subnautica Wiki
- Water Retention Subnautica Wiki
- Homing Sense Subnautica Wiki
- Chum Cloud Subnautica Wiki
- Electric Discharge Subnautica Wiki
- Sonic Echo Subnautica Wiki
- Sea Skimmer Subnautica Wiki
- Oxygen Control Subnautica Wiki
- Sandspear Subnautica Wiki
- Needler Mango Subnautica Wiki
- Bullethead Subnautica Wiki
- Hoverthorn Subnautica Wiki
- Water Slug Subnautica Wiki
- Toxic Sponge Subnautica Wiki
- Collector Leviathan Subnautica Wiki
New & updated guides ship every week. Follow the Atom feed or get notified when new Subnautica 2 guides land.