Last updated: 5 September 2026
Grounded 2 Beginner's Guide — Survive Your First Hours in Brookhollow Park
Grounded 2 drops you into Brookhollow Park at insect scale with almost nothing in your hands. The park feels enormous, every bug looks dangerous, and the crafting menu is full of unknowns. Most first-session deaths aren't caused by the scariest creatures — they happen because new players run out of water, miss the Resource Analyzer entirely, or wander into a hostile zone before they have any armor. This guide walks you through what to do first, in the right order, so your opening hours build momentum instead of frustration.
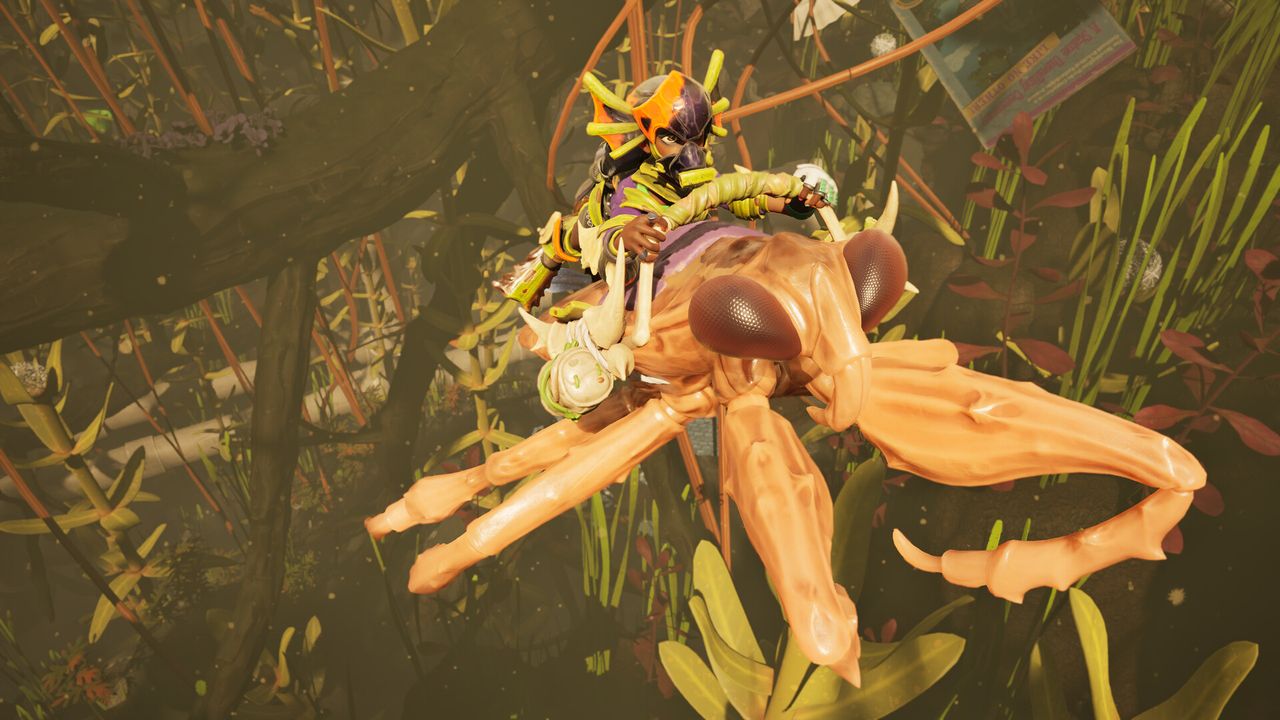
The moment you're shrunk, your two priorities are finding water (dew on grass blades) and upgrading your Omni-Tool with Raw Science. Scan everything at Field Stations to unlock recipes, build a Lean-To before nightfall, and craft Red Ant Armor as soon as you have Ant Parts. These steps carry you through the first few hours without a frustrating respawn.
01The First Five Minutes — Immediate Priorities
When you arrive in Brookhollow Park, resist the urge to sprint off and explore. Spend the first few minutes in the area around your starting point gathering the basics that cost you nothing to collect.
Look for Grass Planks (chop tall grass stems with your Omni-Tool), Sprigs (small plant stalks on the ground), and Pebblets (tiny pebbles beside rocks). These three materials unlock your earliest crafting recipes and cost zero risk to gather.
- Chop nearby grass with the Omni-Tool to collect Grass Planks and Plant Fiber.
- Pick up Sprigs and Pebblets from the ground — they're small and easy to miss, but critical early crafting ingredients.
- Find the nearest Ranger Outpost (look for sprinklers nearby — they mark the location) and scan every new material you carry at its Resource Analyzer terminal — scanning unlocks crafting recipes and earns Raw Science.
- Look up blades of grass for dew drops — glistening drops near the tips of grass blades are your earliest water source. Climb or knock the blade to collect them.
The Lean-To (your first campsite/respawn point) can be crafted from just a few Sprigs and Grass Planks. Build one as soon as you have the materials — it sets your respawn location and lets you sleep through the night.
02The Omni-Tool — Your Most Important Item
Grounded 2 introduces the Omni-Tool, a single multi-purpose tool that replaces the separate axe, shovel, hammer, and wrench from the original game. You start with a basic version, but upgrading it should be a top priority across your first session.
Upgrades are purchased with Raw Science, which you earn by scanning new items at a Resource Analyzer (found inside every Ranger Outpost — there are 13 scattered around Brookhollow Park) and by completing Ranger Challenges (small optional objectives). Each scan of a new item grants a batch of Raw Science, so make a habit of scanning every creature, plant, and material you pick up.
Higher Omni-Tool tiers let you chop tougher materials (Weed Stems, Acorn Shells), dig deeper, and build more complex structures — gating you behind the upgrade is the game's way of guiding progression naturally. Focus on getting to Tier 2 before trying to enter areas with thick weeds or large rocks.
- Scan every new item at a Resource Analyzer the moment you pick it up — even one scan per item type is enough to collect the Raw Science.
- Ranger Challenges are tracked at the Ranger Station inside each Ranger Outpost; early ones are simple ("scan 3 bugs", "collect 10 Plant Fiber") and give large Raw Science bonuses.
- The Omni-Tool also acts as a construction tool in build mode — upgrading it expands your building options.
- Unlike your weapons and armor, the Omni-Tool itself has no durability and never breaks — it's also your repair tool for everything else that does wear down, so you don't need to carry a separate repair hammer.
03Water and Food — Surviving the Basics
Thirst drains faster than hunger in Grounded 2, and ignoring it early leads to a quick debuff spiral. Dew Drops on grass blades are your primary early water source — look for shimmering droplets near the tips of tall grass. Knocking a blade (or climbing it) causes the drop to fall, and you collect it by walking through it.
For a more reliable water supply, craft a Dew Collector once you unlock it from a Field Station scan. Place it in an open area and it slowly fills with water overnight, giving you a passive supply at your base.
Food is less urgent in the early game, but you'll want a source before long:
- Berries (Blueberries and Lingonberries) are scattered throughout Brookhollow Park and restore food. They're also used in Smoothie recipes for buffs.
- Mushroom Chunks are found near shaded areas and provide filling food with no prep.
- Crafting a Cookpot unlocks Smoothies — early recipes like the basic Muscle Smoothie (Sprigs + berries) give temporary stat boosts useful in combat.
- Avoid eating unidentified items before scanning them — some plants cause status effects.
04Early Crafting Priority List
Your Workbench (crafted from Grass Planks, Sprigs, and Sap) is the hub for all gear. Here is the order that makes your first sessions go smoothest:
- 1. Lean-To — sets a respawn point. Build this before nightfall on your first day.
- 2. Workbench — unlocks crafting of tools, armor, and weapons beyond basic items.
- 3. Pebblet Spear (Pebblet × 3 + Sprig × 2 + Plant Fiber) — your first reliable weapon against small bugs.
- 4. Torch (Weed Stem + Sap + Plant Fiber) — needed for underground areas and night exploration.
- 5. Storage Chest (Grass Plank × 3 + Sprig × 2) — keeps your resources organised; resources don't perish, so store everything you won't use immediately.
- 6. Red Ant Armor set (Ant Parts + Weed Stem) — early-game armor that reduces damage from most Tier 1 and 2 bugs. Hunt Red Ants near the park's central grass areas once you have a weapon.
Do not rush crafting a bow until you have spare materials — the Pebblet Spear covers early threats, and the bow (requiring Web Fiber) is more valuable once you start fighting faster creatures at range.
05Your First Night — What to Expect
Nightfall in Brookhollow Park is genuinely dark. Creatures that are dormant during the day become active, and some that are neutral during daylight hours grow more aggressive. If you haven't crafted a Torch by nightfall, reach a safe structure or your Lean-To and sleep through until dawn.
After your first night, the game's pacing opens up significantly — you'll have a Workbench, early weapons, and enough Raw Science from scanning to begin upgrading your Omni-Tool. Treat the first day as a setup loop: gather, scan, build, sleep.
- Sleep at a Lean-To or Bed to skip the night safely — you wake just before dawn.
- If caught outside without a Torch, crouch-walk near large rocks or thick grass; many hostile bugs lose interest if you stay still and silent.
- Fireflies appear at night and are Tier 3 neutral creatures — they won't attack unless you provoke them, but they travel in groups that can mob you quickly if you accidentally hit one.
- Avoid the Wolf Spider at night in your first hours — it's a Tier 3 hostile that will chase you far beyond its initial territory.
06Unlocking the Buggy — Early Mount Priority
One of Grounded 2's new features is Buggies — tameable insect mounts that let you carry heavy materials, move faster across the map, and fight at range from a mounted position. The Red Soldier Ant Buggy is the first and most useful early-game mount.
Unlocking it is tied to an early main-story quest that leads you to the Hatchery Anthill: find the Red Soldier Ant Egg, bring it back to a Hatchery structure, and wait out the incubation time to get a working mount. The nearest Ranger Outpost is worth reaching early regardless — it also unlocks Science Shop purchases and advanced building recipes.
- The Egg Hunt is completable with Tier 1 gear if you're cautious; you do not need Red Ant Armor first, but it helps.
- Buggies are upgraded through the Buggy Progression system (added in Beat the Heat v0.4): collect Moldy Milk Molars — distinct from the regular Milk Molars used for mutation slots — and spend them at the Buffin' Barrel to increase your buggy's health, stamina, and inventory capacity. You can also evolve your buggy to the next tier for a larger power jump.
- Use the Buggy for resource runs — hauling Grass Planks, Weed Stems, and Acorn Shells for base building becomes far less tedious.
07New Zones — Bayou, Mountains, and the Abyss (Into the Abyss, v0.5)
The Into the Abyss update (0.5) opened up a large new Pond region beyond the park's original biomes, with two accessible surrounding areas plus one true end-game zone underneath the water. You don't need to worry about any of these in your first few hours, but it's worth knowing they exist as a longer-term goal.
- The Bayou — a swampy, shallow-water area with water-adjacent bugs such as Tiger Mosquitoes and Striped Bark Scorpions. It's the gentler of the two surrounding zones, closer in difficulty to the park's early areas.
- The Mountains — an elevated, rockier area with tougher enemies. Treat it as mid-to-late-game content, not a first-week destination.
- The Abyss — the deepest zone, sitting at the very bottom of the Pond. It's explicitly end-game content that Obsidian recommends tackling in co-op rather than solo.
Reaching the Abyss requires a full Diving Suit — the helmet, chestplate, and boots all have to be crafted and equipped before the entrance (a moon pool at the Diving Station on the Pond floor) will open. To unlock the suit's recipes, find the three Aquatic Optical Disks — one inside the Diving Station itself, one in Gnarly Bark's upper trunk (Mountains side), and one on the broken bridge near the Bayou — then redeem them at a Ranger Station terminal. Each piece then costs Raw Science at the Science Shop plus crafting materials such as Quartz Glass, Toe Biter Shell, Cattail Fluff, and Wax. Basic oxygen gear (a Gill Tube) is enough for shallow Pond exploration before you have the full suit, but the Abyss gate itself stays locked until all three Diving Suit pieces are equipped.
08Common Beginner Mistakes to Avoid
These are the mistakes that send new players back to their last respawn:
- Ignoring the Resource Analyzer. Scanning at a Resource Analyzer (inside any Ranger Outpost) is the most reliable way to unlock crafting recipes — without it, you'll be stuck with basic tools far longer than necessary.
- Not setting a Lean-To early enough. Dying before placing a respawn point sends you back to the game's default start. Build a Lean-To within your first 10 minutes of play.
- Running out of water. Thirst hits faster than hunger. Always collect dew drops when you spot them, and build a Dew Collector at your base once unlocked.
- Attacking a swarm creature solo. Creatures like Ants and Fireflies have swarm behaviour — attacking one alerts all nearby members of the species. Engage with purpose, not accidentally.
- Trying to fight a Wolf Spider before you're ready. Wolf Spiders are relentless chasers with high damage. Back away slowly if you see one; do not sprint (it triggers pursuit).
- Letting your weapons and armor wear down. Unlike the Omni-Tool (which never breaks), your weapons and armor do have durability — use the Omni-Tool's built-in repair function on them regularly instead of fighting with a half-broken weapon.
FAQ
What should I do first in Grounded 2?
Collect Grass Planks, Sprigs, and Pebblets from your starting area, then immediately find the nearest Ranger Outpost and scan everything in your inventory at its Resource Analyzer. Build a Lean-To to set your respawn point, then craft a Workbench and Pebblet Spear. These four steps give you a safe foundation before nightfall.
Where do I find water in Grounded 2?
Look for dew drops glistening near the tips of tall grass blades — walk into them or knock the blade to collect. Once you have materials and the recipe unlocked (via a Resource Analyzer scan), build a Dew Collector at your base for a passive overnight supply.
How do I get Raw Science in Grounded 2?
Scan new items at a Resource Analyzer (found inside any Ranger Outpost around Brookhollow Park) — each new item type you scan gives a Raw Science reward. Completing Ranger Challenges also grants large batches of Raw Science. Spend it at a Ranger Station's Science Shop to upgrade the Omni-Tool and unlock advanced recipes.
How do I upgrade the Omni-Tool in Grounded 2?
Earn Raw Science by scanning items at a Resource Analyzer and completing Ranger Challenges, then spend it at a Ranger Station's Science Shop. Each tier unlock requires a certain Raw Science total and sometimes specific crafting materials. Reaching Tier 2 should be your first upgrade goal.
What is the best early armor in Grounded 2?
Red Ant Armor is the most accessible early-game set. It requires Ant Parts (from Red Ants in the central grass areas) and Weed Stem, and it reduces damage from most Tier 1–2 bugs significantly. Craft the full set — helmet, chest, and legs — for maximum early protection.
Is Grounded 2 hard for beginners?
The first session is the steepest part of the curve. Most early deaths come from dehydration, being caught without a respawn point, or accidentally provoking a swarm creature. Once you have a Lean-To, a weapon, and a Red Ant Armor set, the early game becomes much more manageable. The game scales difficulty with your exploration — the grass areas around your start are significantly safer than the park's deeper biomes.
What are the Bayou, Mountains, and Abyss zones in Grounded 2?
They're new areas added in the Into the Abyss (0.5) update, built around a large Pond region. The Bayou is a shallow, swampy zone and the easier of the two surrounding areas; the Mountains are a tougher, rockier area; the Abyss is the deepest part of the Pond and is explicitly end-game content best played in co-op. All three come well after the early game — focus on your first shelter and armor before heading there.
How do I get the Diving Suit in Grounded 2?
Find the three Aquatic Optical Disks — inside the Diving Station on the Pond floor, in Gnarly Bark's upper trunk on the Mountains side, and on the broken bridge near the Bayou — then redeem them at a Ranger Station terminal to unlock the Diving Suit's helmet, chestplate, and boots recipes. Craft and equip all three pieces (Raw Science plus materials like Quartz Glass, Toe Biter Shell, Cattail Fluff, and Wax), then head to the Diving Station's moon pool — it only opens once the full suit is equipped, and it's your gateway into the Abyss.
Do I need to play the original Grounded before Grounded 2?
No. Grounded 2 is a standalone sequel set in a new location — Brookhollow Park — with its own story. Returning players will recognise the four characters and some mechanics, but the game fully reintroduces everything. You can start fresh without any prior knowledge of the original.
Sources
Where the facts on this page were checked. If one of them now says something different, we want to know — tell us and we will fix the guide.
- Grounded 2 — Grounded Wiki Grounded Wiki (wiki.gg)
- Omni-Tool — Grounded Wiki Grounded Wiki (wiki.gg)
- Raw Science — Grounded Wiki Grounded Wiki (wiki.gg)
- Resource Analyzer — Grounded Wiki Grounded Wiki (wiki.gg)
- Ranger Outposts — Grounded Wiki Grounded Wiki (wiki.gg)
- Buggies — Grounded Wiki Grounded Wiki (wiki.gg)
- Beat the Heat Update – Your Lizard Has Arrived Obsidian Entertainment
- Into the Abyss: The Biggest Grounded 2 Update Yet Obsidian Entertainment
- Patch 0.5.0.5 Has Been Released Obsidian Entertainment
New & updated guides ship every week. Follow the Atom feed or get notified when new Grounded 2 guides land.