Last updated: 19 September 2026
Crimson Desert Boss Guide Mechanics & Tactics
Crimson Desert boss fights are shaped as much by the living world of Pywel as by your weapon choice — sandstorms cut visibility to near zero, rain drops your elemental resistances and supercharges lightning attacks, and extreme temperatures drain your stamina before you throw a single punch. This guide covers how those systems interact, how gear refinement scales encounter difficulty, general tactics that apply to most bosses, and detailed strategy for two of the campaign's earliest difficulty spikes.
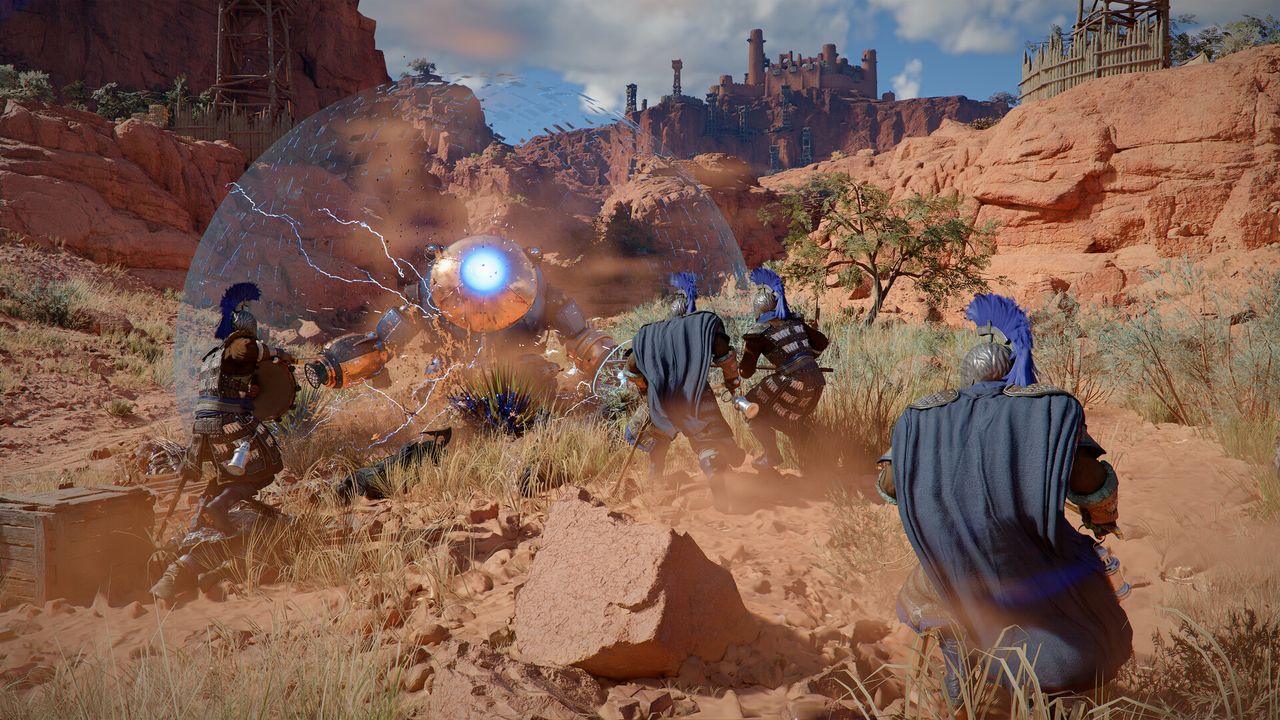
01How the Environment Changes Boss Fights
Crimson Desert runs weather in real time, and boss arenas render with whatever conditions happen to be active when you arrive — there's no scripted reset that clears the weather for a cutscene or an encounter. That means reading the environment before you engage matters as much as reading the boss's healthbar.
The game cycles through eight weather states (clear, cloudy, rain, thunderstorm, fog, snow, heatwave, and sandstorm), and three of them have a direct mechanical impact on boss fights:
- Sandstorms — visibility drops to near zero at range, ranged attacks take a steep accuracy penalty, and a stacking movement-speed debuff builds up the longer you stand in one. Melee becomes the only reliable option, and tracking a fast humanoid boss's tells gets genuinely difficult when you can't see the wind-up clearly.
- Rain and lightning conditions — rain applies a flat -13 Ice Resistance / -9 Lightning Resistance penalty. Any enemy using a lightning-element attack hits noticeably harder against a wet target, so if you're mid-fight against a lightning boss and rain starts, retreating to cover or eating resistance food before re-engaging is worth the tempo loss.
- Extreme temperature — the gauge next to your minimap turns blue in cold zones and red in hot ones. Both extremes drain stamina faster and slow its regeneration, and since dodging and heavy attacks share the same stamina pool, overheating or freezing mid-fight means running dry on defensive options at the worst possible moment.
02Gear Refinement and Difficulty Scaling
Boss difficulty in Crimson Desert isn't fixed — it scales against your equipment level, so arriving under-geared at a story checkpoint creates a noticeably harder fight than the same encounter with a few hours of refinement work behind you.
Gear sits on two layers. Refinement runs from +0 to +10, and each step adds roughly 8% to all of that piece's stats — a +10 weapon carries about 80% more effective stats than an unrefined one, a large enough gap that under-refined gear visibly extends fight length and punishes mistakes harder. Abyss Gear sockets slot into equipment separately and customize elemental output and resistances; slotting cold-resistance gear before an ice-themed arena, for example, offsets the temperature penalty above and frees up stamina for offense instead of survival.
As a practical benchmark, aim for Health and Stamina stat Level 4 and weapon refinement of roughly +4 or higher before the campaign's early difficulty spikes (see Kearush the Slayer below), and push toward +6–7 refinement for the back half of the story. Several bosses also drop gear that unlocks that boss's own signature skill when equipped, so clearing a hard fight with the right loadout compounds into the rest of the campaign.
03General Combat Tactics
Crimson Desert's bosses split roughly into humanoid fighters and monster-type enemies, and each rewards a different default approach.
- Humanoid bosses reward aggression and parrying. Blocking at the moment an attack lands triggers a perfect counter with a free combo window — chaining light attacks into heavy attacks after a successful parry is an efficient punish cycle against most sword-wielding opponents.
- Monster bosses mostly use unblockable attacks, so dodging is your primary defense. Dodge through an attack's animation rather than away from it — ending up behind the boss gives you a melee window without burning extra stamina retreating.
- Match your element to the fight. Imbuing attacks with the right element (fire against ice-weak targets, and so on) noticeably raises damage output, and swapping elements mid-fight when the weather flips is a high-value habit once you're comfortable with the basics.
- Stock cheap food, not expensive food. Standard Grilled Meat restores 80 HP per piece from a single raw ingredient and has no animation lock on default difficulty, so it can be eaten almost instantly and repeatedly mid-fight (Hard difficulty adds a delay between uses). Ten base-tier Grilled Meat from ten raw ingredients heals about 800 HP total, versus roughly 220 HP from a single Hearty Grilled Meat made from the same ten ingredients — for pure healing volume during a boss attempt, bulk cheap food beats premium recipes.
- Elite enemies carrying Abyss Artifacts get abilities standard encounters don't have. A sudden glow effect or an unfamiliar attack pattern usually signals one is active, and that's a moment to play defensively rather than push damage.
04Boss Spotlight: Reed Devil
Reed Devil is the campaign's first real difficulty spike and the fight most players are under-geared for on arrival. Reaching him means surviving a cliffside gauntlet first — a chase through Reedwind Valley where minions respawn continuously around you — don't try to clear every minion, just push through to the arena. The boss fight itself runs across three health bars and multiple phases.
His most dangerous attacks are charged knife-throws and reed-whip strikes at range and in melee. The arena also has destructible totems that pulse a stacking movement-slow debuff if left standing — prioritize breaking them early so they don't compound with his other pressure. Keep blocking through his early combo chains to interrupt them, then shift to dodge-focused defense once his attacks speed up and blocking starts costing more stamina than it's worth.
05Boss Spotlight: Kearush the Slayer
Kearush is the game's first large-scale monster boss — a gorilla-like enemy with three health bars and attacks that hit noticeably harder than anything earlier in the story. The core loop is straightforward: dodge forward-right around his swing, land a short punish, then disengage before he recovers. Don't try to extend combos here; his recovery speed punishes greed.
The fight's critical phase is a super armor state, signaled by a blue glow, during which your hits won't interrupt his animations and his own attacks deal more damage. Disengage fully when it appears — run to the arena's edges and wait it out rather than trading. Bring 100+ pieces of Grilled Meat and aim for roughly +4 refinement or better before starting; this is commonly cited as the campaign's first real skill check.
06Boss Rematch and Difficulty Modes
Pearl Abyss added a boss rematch system in Patch 1.05.00, letting you replay defeated campaign bosses outside the story context to practice mechanics or revisit a fight that felt rushed the first time. You access it by returning to the boss's original location, lighting a lantern, and interacting with the Memory Fragment that appears — consumables used during the rematch are restored afterward, though rematches currently drop no loot.
Rematches offer two modes: Reminisce recreates the fight exactly as it was on your first encounter, stats and all, while Resonate scales the boss up to match your current progression, but only kicks in once you've actually outleveled the original fight. Selectable Easy/Normal/Hard difficulty options (added in Patch 1.04.00) change the wider combat curve too — Easy softens the stamina-drain penalty from temperature extremes and reduces the weather-matched elemental damage bonus enemies get, though sandstorm visibility loss and heat/cold stamina drain stay active at every difficulty level.
07FAQ
FAQ
Does weather actually change boss fight mechanics in Crimson Desert?
Yes. Weather runs in real time during every boss fight with no scripted reset. Rain applies a flat -13 Ice Resistance / -9 Lightning Resistance penalty, so lightning-element bosses hit noticeably harder against a wet target. Sandstorms cut visibility sharply, penalize ranged accuracy, and apply a stacking movement-speed debuff, making fast humanoid bosses harder to read.
How does temperature affect boss fights?
Extreme heat or cold drains stamina faster and slows its regeneration. Since dodging and heavy attacks share the same stamina pool, getting caught overheated or frozen mid-fight means running out of defensive options at the worst time. Climate-appropriate gear or resistance food before a tough arena offsets the penalty.
What gear refinement should I aim for before major bosses?
Roughly +4 refinement and Health/Stamina Level 4 is a reasonable floor for the campaign's early difficulty spikes like Kearush the Slayer, moving toward +6–7 refinement for the back half of the story. Each refinement step adds about 8% to a piece's stats, so a +10 weapon carries roughly 80% more effective stats than an unrefined one — under-geared attempts visibly extend fight length.
What's the best food to bring to boss fights?
Standard Grilled Meat: it restores 80 HP per piece from a single raw ingredient and has no animation lock on default difficulty, so it can be eaten almost instantly and repeatedly (Hard difficulty adds a delay between uses). Ten base-tier Grilled Meat from ten raw ingredients heals about 800 HP total, versus roughly 220 HP from one Hearty Grilled Meat made from the same ten ingredients — cheap food in bulk outperforms premium recipes for pure healing volume.
Can I refight bosses I've already beaten in Crimson Desert?
Yes, via the boss rematch system added in Patch 1.05.00. Return to the boss's original location, light a lantern, and interact with the Memory Fragment. Choose Reminisce to replay the fight exactly as first encountered, or Resonate to scale the boss to your current progression once you've outleveled the original fight. Consumables used are restored afterward; rematches currently give no loot.
Sources
Where the facts on this page were checked. If one of them now says something different, we want to know — tell us and we will fix the guide.
- Crimson Desert Weather System: How Weather Affects Combat and Exploration Crimson Desert Strats
- A Guide to Weathers and Temperatures in Crimson Desert IsMyGameDown
- Grilled Meat page Fextralife
- Crimson Desert How to get food healing items & grilled meat fast PowerPyx
- How to Rematch Bosses in Crimson Desert VULKK
- Crimson Desert Patch 1.05 Adds Boss Rematch and Legendary Pets games.gg
- All Crimson Desert Campaign Bosses And How To Beat Them GameSpot
- Crimson Desert: Complete Boss Guide — All Strategies & Weaknesses DropReference
- Crimson Desert Refinement Guide: How to Upgrade Weapons and Armor KeenGamer
- Crimson Desert Reed Devil Boss Mechanics & Preparation Guide TheGamer
- Crimson Desert Kearush Boss Guide: Preparation & Mechanics TheGamer
New & updated guides ship every week. Follow the Atom feed or get notified when new Crimson Desert guides land.