Last updated: 31 August 2026
Mortal Shell 2 Beginner Tips and Tricks for a Strong Start
Mortal Shell 2 doesn't explain most of its systems up front, and a few early decisions — which Shell you commit to, whether you equip the Slayer Seal, how you spend your first Glimpses — are much easier to get right the first time than to fix later. Here's what actually helps.
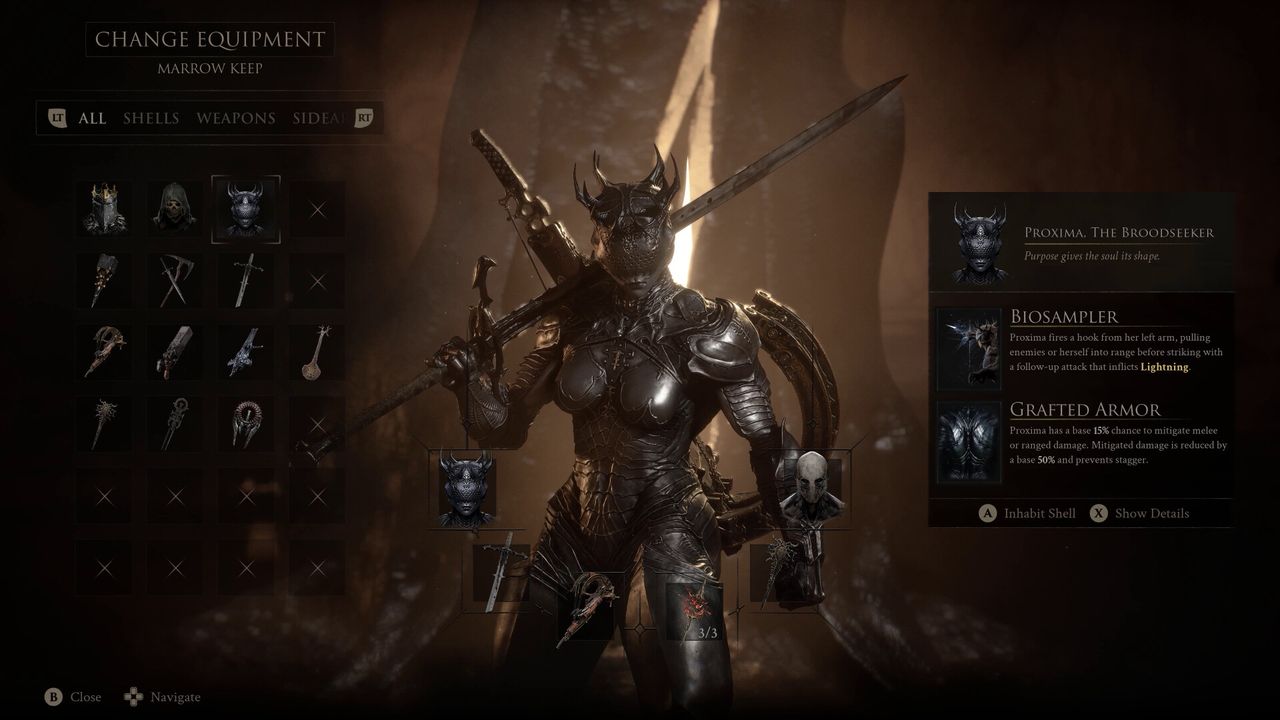
Head to Tiel or Proxima near Marrow Keep as soon as you can and commit your limited Glimpses to one main Shell instead of spreading them thin. Cleanse every Beacon the moment you find one, turn on auto pick-up gold in settings, and watch the walls — false ones are marked with a glyph and hide some of the best rewards. The Slayer Seal makes early fights easier but disables achievements while equipped, so decide before you put it on.
01Turn On Auto Pick-Up Gold First
Before you leave the prologue, check the settings menu for an auto pick-up gold option and turn it on. It automatically collects coins as you walk over them instead of requiring a manual prompt, which matters more than it sounds like in low-visibility areas such as swamps, where loose gold is easy to walk past without noticing.
02Commit to One Shell Early
After leaving Marrow Keep, the map points you toward two nearby Shells: Tiel and Proxima. Both are viable mains and a clear step up from Harros the Vassal, the temporary Shell you use in the prologue and lose before the main game opens up, so grab whichever appeals to you and head there directly rather than exploring blind first.
The bigger decision is what you do once you have a second or third Shell: pick one as your main and commit your upgrade materials to it. Glimpses — the resource used to permanently upgrade a Shell — are finite for the whole playthrough. Most players only find enough to fully max out two or three Shells, not every Shell they pick up, so spreading them across three or four half-upgraded Shells leaves you weaker across the board than focusing on one or two.
Balance Patch 1 (August 2026) made this a little more forgiving: shell map locations — the items that reveal where to find a new Shell — now cost Gloom instead of Glimpses, and any Glimpses you'd already spent on them were refunded in full. That doesn't change the core advice, but it does mean more of your Glimpse stock is free to go straight into upgrading your main Shell instead of being eaten up just finding the others.
03Cleanse Every Beacon the Moment You Find It
Beacons aren't just rest points — cleansing one clears a small mini-dungeon around it, and those mini-dungeons hand out weapons, Tarstones, and Ova (used to unlock fast travel and endgame content). Do this at every Beacon you come across instead of saving it for later; skipping it now just means a longer backtrack once you remember.
It's also worth manually marking dungeons as cleared on your map once you finish them. Mortal Shell 2 doesn't track that for you, and without your own markers it's easy to re-enter an area you already cleaned out.
04Watch the Walls — False Walls Hide Real Rewards
Some walls in Mortal Shell 2 aren't solid. Look for a small glyph symbol near a section of wall, usually close to a light source with nothing blocking it — that's the sign a wall is fake and can be broken or pushed through. These false walls are one of the most commonly missed sources of gear and Tarstones, so it's worth pausing to check suspicious dead ends rather than assuming every corridor that looks closed off actually is.
05The Slayer Seal: Easier Fights, No Achievements
Past the merchant Merrick in Marrow Keep, you can find and equip the Slayer Seal, an item that makes your Sidearms deal Break damage and heals you (and restores Resolve) on a successful Riposte. It's a meaningful power spike for players finding early fights rough.
The catch: equipping the Slayer Seal disables achievements and trophies for that save — permanently, not just while it's active. The game shows a warning before you can equip it, and unequipping it afterward does not restore achievement tracking. If you're playing for the platinum or the full achievement list, decide before you put it on.
FAQ
What is the best Shell to start with in Mortal Shell 2?
Tiel and Proxima are both solid choices and the two Shells the game points you toward first, near Marrow Keep. Neither is objectively better — pick the one whose skills you prefer, then commit your upgrade materials to it rather than splitting them between Shells.
Should I use the Slayer Seal in Mortal Shell 2?
Only if you don't care about achievements and trophies on that save — equipping it permanently disables them, even if you unequip it afterward. It makes Sidearms deal Break damage and heals you on Riposte, which is a real help in tough early fights, but it's a trade-off, not a free bonus.
How do I find false walls in Mortal Shell 2?
Look for a small glyph symbol on a wall, typically near a light source with nothing in front of it. That glyph marks a false wall you can break or push through, and it's one of the most commonly missed ways to find extra gear and Tarstones.
Should I upgrade every Shell I find?
No. Glimpses, the material used to permanently upgrade Shells, are limited across a full playthrough — most players only have enough to fully max out two or three Shells. Balance Patch 1 (August 2026) moved shell map costs to Gloom instead of Glimpses and refunded any Glimpses already spent on them, but the core trade-off is unchanged: pick a main Shell early and commit to it instead of spreading upgrades thin.
Do I need to cleanse every Beacon in Mortal Shell 2?
You don't have to, but it's worth doing as you go. Cleansing a Beacon clears the mini-dungeon around it for rewards like weapons, Tarstones, and Ova, and doing it immediately saves you a backtrack later.
Sources
Where the facts on this page were checked. If one of them now says something different, we want to know — tell us and we will fix the guide.
- Balance Patch 1 - Patch Notes Cold Symmetry (Steam Community)
- Mortal Shell 2 Patch Notes Fextralife
New & updated guides ship every week. Follow the Atom feed or get notified when new Mortal Shell 2 guides land.