Last updated: 5 September 2026
How to Grow Weed in Schedule I — Complete Guide
Growing is the engine of your Schedule I business — everything else (mixing, dealers, automation) sits downstream of the plants. But the system has more depth than it looks: your choice of container, light, soil, and additives shapes how much you produce, how fast, and at what quality. This guide walks through every variable so you can build a grow operation that actually scales.
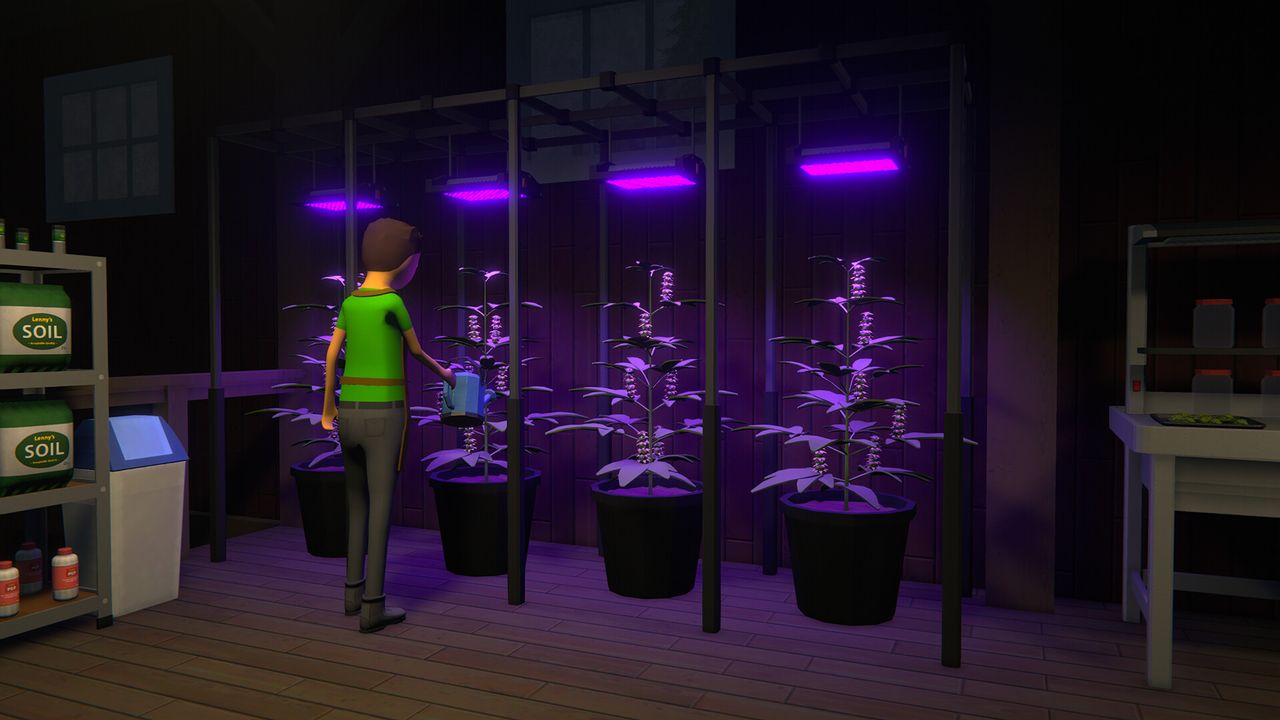
Growing in Schedule I works in two tiers: cheap grow tents give 8 units per cycle with no extras needed, while pots with a suspension rack and a light give 12 units per cycle and grow faster. Pots are a 50% yield bump for modest extra cost and are worth the upgrade. Fertilizer adds one quality tier to your harvest with no downside. Speed Grow halves grow time but costs one quality tier. PGR adds 33% yield but also costs one quality tier. Drying racks (unlocked at Hustler III, $250) add one quality tier per 12 in-game hours of drying — combine Fertilizer during the grow and a Drying Rack after to push your product two tiers higher. Start with OG Kush and upgrade to Granddaddy Purple once you can afford it; it commands the highest base price of the four strains.
01Tents vs Pots — Your First Upgrade Decision
This is the first real fork in the road. Both grow the same strains; what differs is yield and speed:
- Grow Tents (8 units per cycle) — the starter option. Self-contained; plant a seed, add soil, water, and wait. No light or rack needed. Buy at Handy Hank's Hardware in the northeast of the map.
- Pots (12 units per cycle) — a 50% yield jump over tents. Require a Suspension Rack (around $40 each) and a grow light. Buy pots at Hank's; racks and lights at Oscar's Warehouse once your progression unlocks it.
- Moisture-Preserving Pot — same 12-unit yield as a standard pot, but loses 40% less moisture per cycle. Lower maintenance if you are watering manually.
- Air Pot ($120) — same 12-unit yield, but gains 15% growth speed. Moisture drains 30% faster, so it needs more frequent watering or a botanist.
The recommendation: start with one or two tents to learn the loop and generate your first cash, then switch to pots with lights as soon as you can afford the rack-and-light setup. The yield difference compounds significantly once you have several containers running.
02Lights and Soil
Pots need a light above them (and a Suspension Rack to hold it). Lights only affect growth speed — not yield or quality:
- Halogen Grow Light — baseline speed. The minimum required for pots; cheapest option.
- LED Grow Light (~$80) — 15% faster growth than Halogen. A meaningful mid-game upgrade.
- Full-Spectrum Grow Light (~$200) — 30% faster growth than Halogen. Best available; pay for it as soon as cash allows.
Soil, bought at Hank's Hardware, determines how many cycles you get before replacing it. It does not affect yield or quality — only reuse count and therefore cost-per-harvest:
- Standard Soil — 1 grow cycle, then replace.
- Long-Life Soil — 2 grow cycles. The best balance of cost and convenience for mid-game.
- Extra Long-Life Soil — 3 grow cycles. Best value at scale once you have many pots running.
Growth time at base speed runs around six in-game hours per marijuana cycle. A Full-Spectrum light cuts roughly 30% off that; an Air Pot adds another 15% on top. Combining both meaningfully shortens the cycle and increases how many harvests you turn per session.
03The Grow Cycle Step by Step
A single grow cycle follows a fixed sequence — optionally extended by a drying step at the end:
- Plant the seed in a container (tent or pot). Make sure soil is in place first.
- Water regularly — if the moisture bar hits zero, growth halts. A watering can does it manually; a botanist does it automatically.
- Wait for the grow phase to complete — around 6 in-game hours at base speed in a tent. Lights and pot type reduce this.
- Harvest with Trimmers — hold left-click and drag across the mature plant to collect the buds. Tents give 8 units; pots give 12.
- Optional: place harvested product on a Drying Rack to gain one quality tier per 12 in-game hours. Then collect and package.
Package the product via your production setup (baggies, bricks — whatever your current operation uses) and sell through the phone or your dealers.
04Additives — The Quality and Yield Trade-offs
Three additives change what you get from each cycle. Each involves a trade-off, and the right choice depends on whether you are optimizing for quality, volume, or speed:
- Fertilizer — quality +1, no downside. Add during the grow phase. The safest additive; use it by default once you can afford it — higher quality improves customer satisfaction and sample conversion rates, and demanding buyers in later districts require Standard or above, with no penalty to yield or timing.
- Speed Grow — growth time halved, quality −1. Useful when you need to turn cycles faster (e.g., automating a high-volume operation where throughput matters more than price per unit). The quality loss means you should pair it with a Drying Rack to claw back that tier.
- PGR (Plant Growth Regulator) — yield +33% for weed, quality −1. More product per cycle at the same per-unit price, but the lower quality tier reduces customer satisfaction and makes sampling harder. Best suited to operations where you have strong dealer coverage and prefer volume. Again, combine with a Drying Rack to recover the quality tier.
A practical mid-game strategy that stacks well: Fertilizer during the grow (+1 quality) followed by a Drying Rack after harvest (+1 quality). You net two quality tiers above base without using Speed Grow or PGR, so yield and cycle time stay clean.
05Drying Racks and Quality Tiers
There are five quality tiers for weed in Schedule I, from lowest to highest: Very Low → Poor → Standard → Premium → Heavenly. Quality does not directly raise the price you can charge per unit — price is determined by the base strain value plus any mixing effects. What quality does affect is customer satisfaction and sample conversion: demanding customers in later districts refuse Very Low or Poor product, and higher quality significantly improves the success rate when offering free samples to hook new buyers.
The Drying Rack is the main way to push quality up post-harvest:
- Where to get it — Oscar's Warehouse; unlocks at Hustler III rank. Costs $250 each.
- Capacity — up to 20 units per rack.
- Effect — +1 quality tier per approximately 12 in-game hours of drying.
- How to use — place harvested product on the rack, press Dry, and wait. Collect once the timer completes.
- Automation — assign a botanist to work the drying rack in your property management, rather than just routing product through it passively. Without a botanist assigned, automated setups can route around the rack entirely.
Note: as an Early Access title, Schedule I receives frequent balance patches. Quality tier names, additive values, and price multipliers may shift between updates — verify specifics in-game when coming back after a major patch.
06The Four Strains
All strains are ordered through Albert Hoover and use the same core grow loop. They differ in base price, associated effects, and which mixing combos they open up:
- OG Kush — the starter strain. Cheapest, among the fastest to grow, available earliest. The right choice for learning the loop and funding your first upgrades. Highly flexible for mixing.
- Sour Diesel — carries a Refreshing base effect and has 10% addictiveness (OG Kush is 0%), so customers come back more reliably once hooked — a meaningful edge for building your customer base. Unlocks at Street Rat IV. Comparable grow time to OG Kush.
- Green Crack — carries an Energizing base effect and has 34% addictiveness (unlocks at Hoodlum II), making it significantly more customer-retaining than the earlier strains. A mid-game option that introduces more mixing variety.
- Granddaddy Purple — unlocks at Hoodlum IV and has the highest base sell value of the four weed strains (seeds cost $45 vs OG Kush's $30, reflecting a higher product price). The go-to once your operation can absorb the cost and you have the dealer network to move it. Its Sedating effect has 0% addictiveness, so pair it with a Drying Rack and Fertilizer to keep quality high and satisfy demanding customers.
The practical upgrade path: start OG Kush → transition to Sour Diesel when you want better customer hooks → move to Granddaddy Purple once your dealer coverage is solid and quality infrastructure is in place.
FAQ
How do you grow weed in Schedule I?
Plant a seed in a grow tent or pot with soil, then water it regularly to keep the moisture bar above zero — if it hits zero, growth stalls. Wait for the grow phase to complete (around 6 in-game hours at base speed), then harvest with Trimmers. Tents give 8 units per cycle; pots with a suspension rack and grow light give 12. Optionally use a Drying Rack after harvest to raise the quality tier before packaging and selling.
Are pots better than tents in Schedule I?
Yes. Pots give 12 units per cycle versus 8 for tents — a 50% yield advantage. Pots also grow faster when paired with a good light (LED or Full-Spectrum). They require a Suspension Rack and grow light on top of the pot cost, but the investment pays back quickly with the higher output. Start with tents if budget is tight, then upgrade to pots as soon as you can afford the rack and light setup.
What does Fertilizer do in Schedule I?
Fertilizer adds one quality tier to your harvested product with no penalty to yield or grow time. It is the safest additive in the game — there is no trade-off. Use it during the grow phase to push your product up one tier, and combine it with a Drying Rack after harvest to push it up a second tier. Higher quality improves customer satisfaction and sample conversion — demanding buyers in later districts won't accept Very Low or Poor product.
What does Speed Grow do in Schedule I?
Speed Grow halves the time your plant takes to grow, which increases how many cycles you can complete in a given session. The cost is one quality tier on the harvest. If you use Speed Grow, pair it with a Drying Rack after harvest to recover that lost tier. It is most useful in automated high-volume operations where cycle throughput matters more than maximising price per unit.
How does the Drying Rack work in Schedule I?
The Drying Rack raises your harvested product by one quality tier per approximately 12 in-game hours of drying. It holds up to 20 units. Place the product on the rack and press Dry, then collect it once the timer is done. It costs $250 and is available at Oscar's Warehouse after you reach Hustler III rank. For automation, assign a botanist specifically to manage the rack — otherwise automated handlers may bypass it.
What is the best strain to grow in Schedule I?
For beginners, OG Kush is the best starting strain — cheapest and readily available, making it easy to learn the grow loop without much upfront investment. For maximum profit per unit once your operation is established, Granddaddy Purple commands the highest base sell price of the four weed strains. Pair it with Fertilizer and a Drying Rack to keep quality high and satisfy the demanding late-game customers who won't accept Very Low or Poor product.
Sources
Where the facts on this page were checked. If one of them now says something different, we want to know — tell us and we will fix the guide.
- How To Get More Product From Each Seed In Schedule 1 TheGamer
- Schedule 1 Quality Types Explained ScalaCube
- How to Use the Drying Rack in Schedule 1 Schedule1Game.net
- Schedule I Weed Guide: The Strains With the Best Profit-Per-Day, Ranked Switchblade Gaming
- Schedule I Production Guide: Mixing, Quality & Packaging Switchblade Gaming
New & updated guides ship every week. Follow the Atom feed or get notified when new Schedule I guides land.