Last updated: 7 September 2026
Onimusha: Way of the Sword Boss Guide — How to Beat Every Boss
Way of the Sword doesn't throw an overwhelming boss roster at you, but it does bring several fighters back in tougher, altered forms once you're deeper into Kyoto. This guide runs through the major fights in roughly the order you'll meet them, with the read on each one and what actually punishes it — Issen, Deflect, or just getting out of the way.
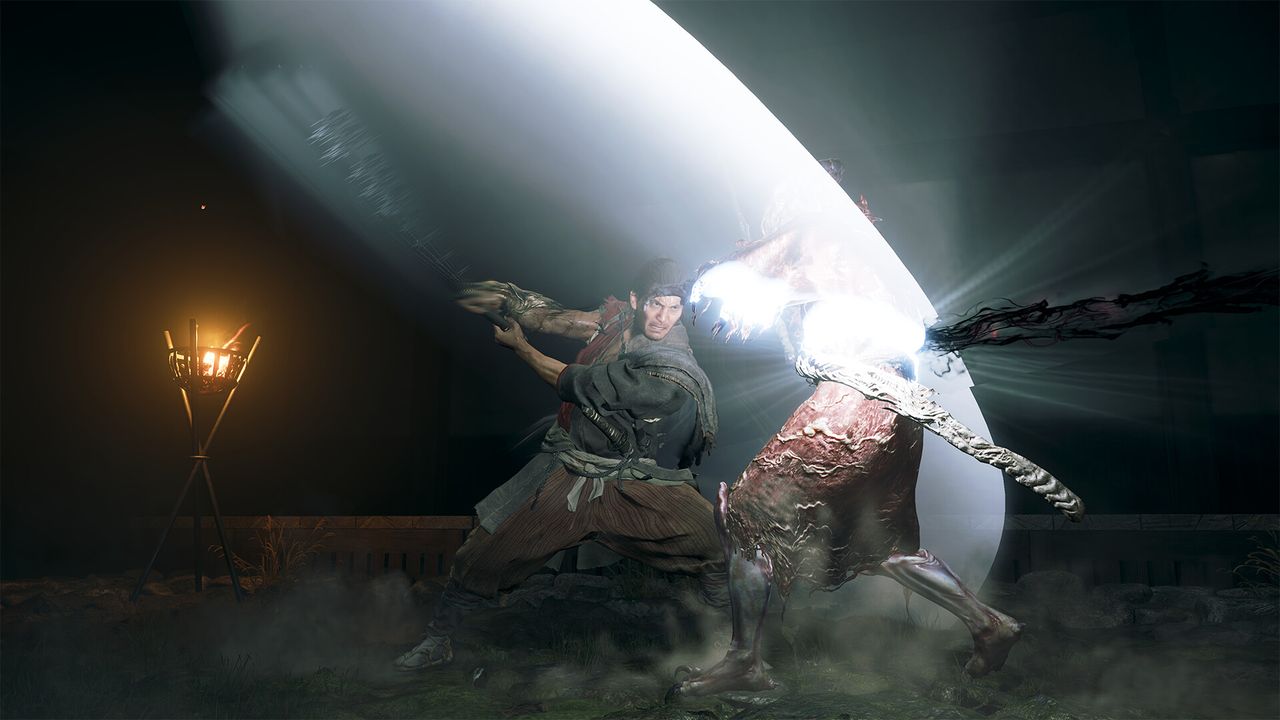
Onimusha: Way of the Sword runs you through roughly a dozen distinct bosses, several of which return later in a harder, "altered" or fully-armed form. Deflect or Issen the readable stuff, dodge anything that glows or telegraphs unblockable, and use Break Issen executions on colored weak points once you've drained a boss's stamina — red for raw damage, purple for extra souls. The final fight against Minamoto no Yoshitsune runs three full phases and is the hardest thing in the game, so go in with your Hozuki healing pouches topped off.
01Sasaki Ganryu — Your First Real Wall
Musashi's rival shows up early and hits fast enough to catch new players off guard. He doesn't give you long, telegraphed openings the way some later bosses do, so lean on Deflect during his flurries and save Issen attempts for his slower single strikes rather than trying to read the whole combo. Blocking a grab attempt outright works too — watch for the wind-up and hold your guard rather than trying to dodge through it.
He returns later in an Altered form fighting alongside a companion. That fight asks you to deflect or counter nearly everything he throws at you while also managing the second combatant, so it rewards patience over trying to force damage in.
02Byakue — Read the Axe, Not the Body
Byakue and his enhanced return later both wield a heavy axe, and the fight comes down to one read: dodge when he isn't swinging it, deflect when he is. His close-range combo strings are quick enough to stun you if you try to trade hits, so stay reactive rather than pressing your own offense between his swings.
In the enhanced encounter, his axe picks up a dark Malice charge below roughly half health — stop standing in the pools it leaves on the ground, since they punish greed far more than the axe itself does.
03Daidara — Strip the Armor First
This armored brute hits like a truck but telegraphs almost everything with slow, easy-to-read wind-ups. The trick isn't dodging the attacks themselves — it's using Break Issen executions on his armor pieces (picking the red soul option when the prompt comes up) to strip his defense down before you commit to sustained damage. Watch for the attack where he licks his mace; that's your cue an unusual follow-up is coming, so don't be standing where the swing will land.
04Rasho-gan — Shoot the Tendrils
Rasho-gan leans on blood projectiles and blade combos rather than pure melee pressure. Deflect his projectiles and grab attempts as they come. When he enrages, tendrils appear on his back — shoot them with your Oni Bow to cut off the environmental attacks he'd otherwise be able to call in, rather than trying to tank them.
05The Nue and Greater Nue
The lion-like Nue (in blue and red variants) are among the more forgiving fights in the game — perfect-dodge the bulk of their attacks without worrying too much about camera lock, and reflect their lightning back at them when the opening comes. The Greater Nue that shows up later is a tougher variant of the same enemy: it adds grabs, faster swipes and outright unblockable attacks, so be patient rather than trying to force the same aggressive read that worked on the smaller version. Counter its white-glowing attacks, and note that its lightning bolts specifically need to be sidestepped rather than deflected.
06Ifuu and Burai — Two Bosses, One Fight
These battle-obsessed siblings have simple, predictable movesets individually, which is good, because you eventually fight them together. Ifuu floats and carries a balloon on their back — shoot it during their charging attacks to interrupt, and deflect their wind-based strikes the rest of the time. Burai relies on lightning patterns and a slam attack with a generous but strict dodge window; learning to clear that slam before it lands matters more than trying to deflect it. In the combined fight, split your attention rather than committing fully to one sibling, since the one you ignore will punish you for it.
07Benkei and Benkei (Fully Armed)
Benkei's first appearance gives you plenty of clean windows to counter with Issen, and choosing red-soul prompts on his armor segments strips pieces off before you go for sustained damage — the same pattern as Daidara. His fully-armed return adds cannons, throwing axes and a flamethrower to the kit. Counter cannon shots with your bow rather than trying to dodge them at close range, and treat the fireball throws the same way you'd treat any other ranged tell: get out of the line, don't try to Deflect from a bad angle.
08Dohatsu-ten
Dohatsu-ten and the enhanced version you meet later are skilled swordsmen whose blades effectively grow stronger as the fight goes on, so don't expect the fight to get easier the longer you drag it out. Break their defense with a Break Issen combo when your attacks stop landing normal damage, and parry or deflect their strings for small, repeatable openings rather than trying to win with raw aggression.
09Shuten Doji — Keep the Pressure On
Shuten Doji starts approachable but turns dangerous in a second form. The key detail: staying aggressive prevents this boss from regenerating health, so don't play too cautiously once you've got a rhythm going. Shoot the boss during fire-breath attacks rather than trying to walk around them, and be aware that the game does not refund unused Hozuki pouch healing charges once you cross into the second phase — use what you need before that transition, not after.
10Dokyo — A Chase, Not a Slugfest
Dokyo plays differently from the rest of the roster: it's a gimmick fight built around movement rather than a standard exchange. Dodge, close the distance, land a few hits, and reset — trying to stand and trade goes badly. One specific tip that helps: firing an Issen just as one of Dokyo's projectiles is about to land can cancel the follow-up string outright, rather than just avoiding the single hit.
11Minamoto no Yoshitsune — The Final Boss
Yoshitsune is the toughest fight in the game and runs three full phases. He hits hard, and his tells are harder to read cleanly than anything earlier in the game, so this is not a fight to walk into half-stocked on consumables. Keep your guard up nearly constantly and lean on Deflect rather than trying to freestyle dodge everything — the third phase in particular pushes you toward using your own Oni Awakening transformation to keep pace rather than fighting it purely defensively.
Because this fight punishes greed more than any earlier boss, treat each phase transition as a chance to reset your positioning and reassess rather than continuing whatever approach worked on the previous phase.
12General Tips That Apply to Every Boss
- Deflect what you can read, dodge what you can't. A held block bleeds your posture over time and isn't a long-term answer on its own — it's the safety net, not the plan.
- Break Issen executions matter. Once a boss's stamina is broken, pick red prompts for raw damage when you need the fight to end, purple when you need souls for upgrades instead.
- Environmental hazards work on bosses too. Kicking carts or throwing planks isn't just a trash-mob trick — several boss arenas give you the same tools.
- Dying doesn't cost you souls or items in Way of the Sword, so treat early attempts at a new boss as scouting, not a real run — you lose time, not progress.
FAQ
How many bosses are in Onimusha: Way of the Sword?
The main roster covers roughly a dozen distinct bosses — Sasaki Ganryu, Byakue, Daidara, Rasho-gan, the Nue, Ifuu & Burai, Benkei, Dohatsu-ten, Shuten Doji, Dokyo and final boss Minamoto no Yoshitsune — but several of them (Sasaki Ganryu, Byakue, Benkei, Dohatsu-ten, the Nue) return later in tougher altered or fully-armed forms, which pushes the total number of distinct boss encounters well past that.
Who is the final boss of Onimusha: Way of the Sword?
Minamoto no Yoshitsune is the final boss, fought across three full phases. He's widely considered the hardest fight in the game — go in with healing items stocked and lean on Deflect rather than trying to dodge everything by feel.
What is Break Issen and when should I use it?
Break Issen is an execution move that becomes available once you've drained a boss's stamina meter. You then choose a colored body-part prompt — red deals more direct HP damage, purple yields more souls — so pick red when you want to close out the fight and purple when you need currency for upgrades instead.
Do bosses in Onimusha: Way of the Sword get harder each time you meet them again?
Several do. Sasaki Ganryu, Byakue, Benkei, Dohatsu-ten and the Nue all get an enhanced, altered, or fully-armed return later in the game with new attacks layered onto their original moveset, so don't assume a boss you've already beaten once will play the same way the second time.
Does dying to a boss cost you your souls or progress?
No. Unlike Souls-likes, Way of the Sword doesn't make you drop your souls or currency on death, and you simply reload from the last checkpoint. That makes it much lower-risk to spend a few attempts learning a new boss's patterns before committing to a real run.
Sources
Where the facts on this page were checked. If one of them now says something different, we want to know — tell us and we will fix the guide.
New & updated guides ship every week. Follow the Atom feed or get notified when new Onimusha: Way of the Sword guides land.